Scanner
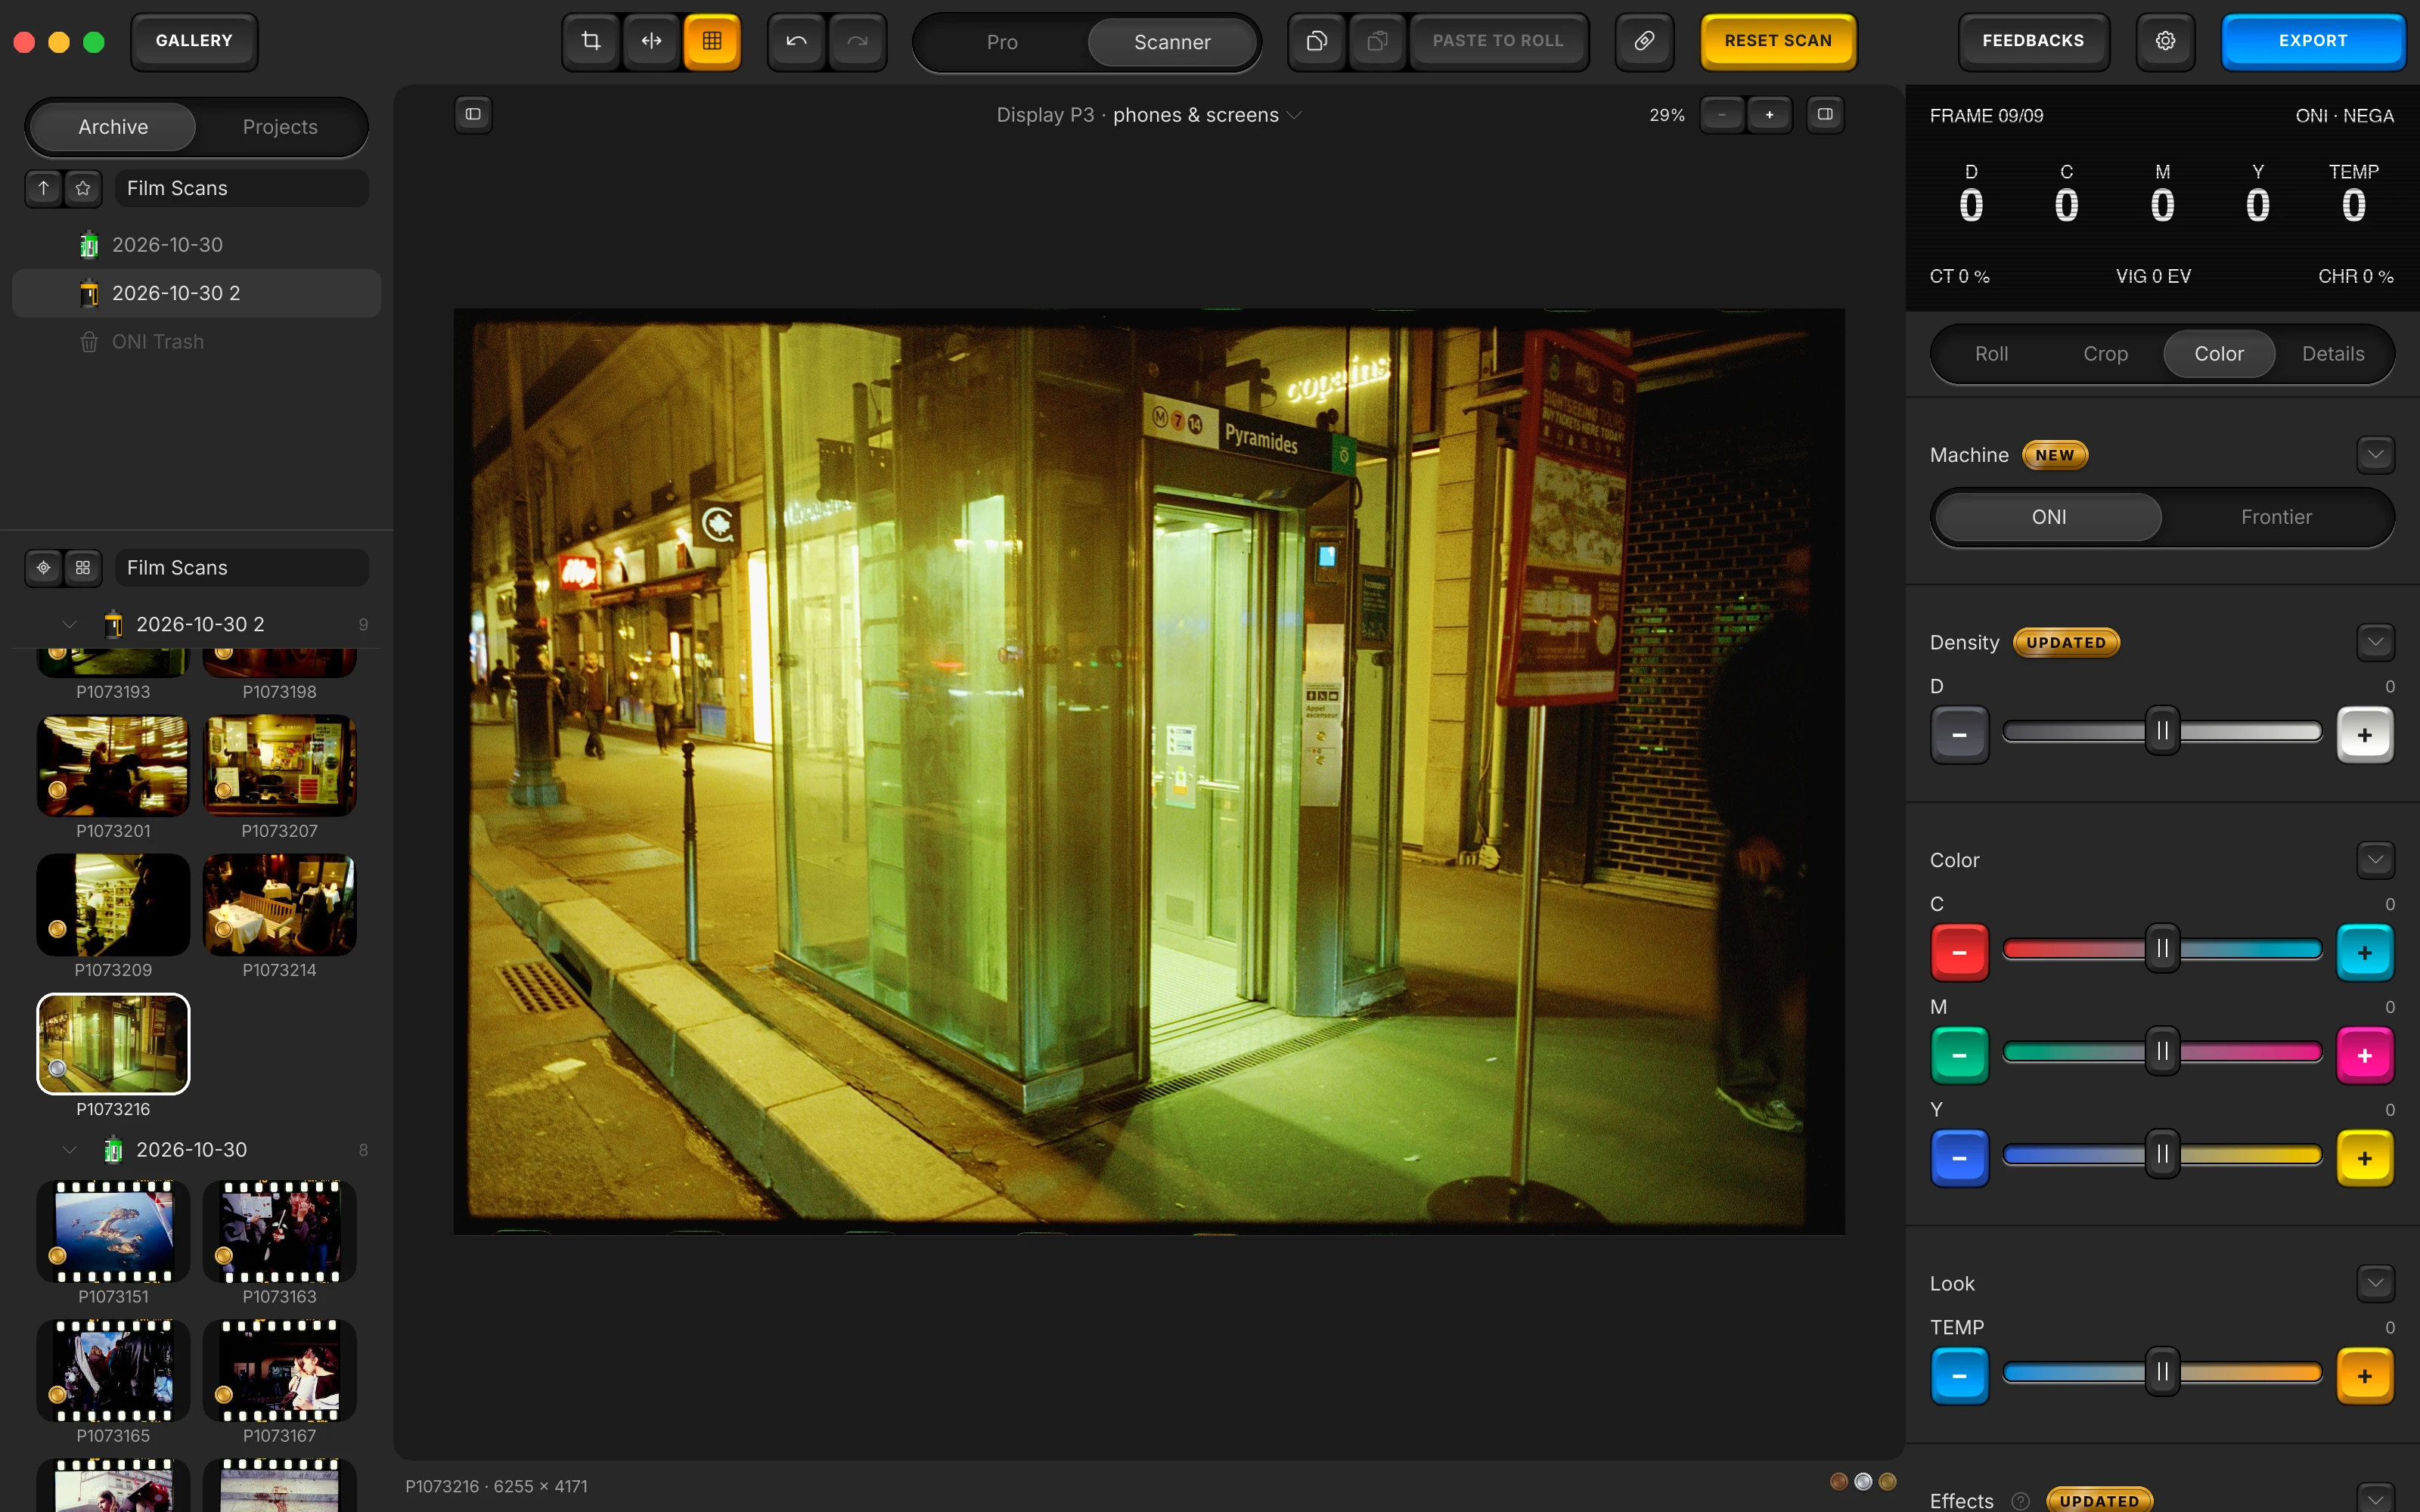
The Scanner face of Open Negative Initiative. A lab scanner's machine and keypad in place of Pro's sliders: ONI or Frontier, then D, C, M, Y and TEMP, then a finish of your own.
Faces
Your photo printed by a lab scanner's machine, then finished by you. On the Scanner face the Color tab opens on Machine, and its keypad stands where Pro's Color and Lighting stand.
Two faces for one photo. Pro's sliders, or a lab scanner's keypad, switched in the centre of the bar.
Two machines. ONI, the app's own conversion, or Frontier, the look of Fujifilm's lab scanner as measured.
Pro and Scanner
An open photo has two faces, switched by Pro and Scanner in the centre of the bar. Pro is the panel of sliders; Scanner renders your photo through a lab scanner's machine, with a keypad in the Color tab.
- Each face keeps its own finish: Contrast, Vignette, Chrome, Curves, Spectrogram and the saturation curve are stored apart, so switching loses nothing.
- Esc goes back to Pro; Scanner Emulator, in the View menu, switches either way.
- The app opens on the face you last left.
- The Roll, Crop and Details tabs work on both faces. The preset deck stands aside on the Scanner face.
ONI and Frontier
Machine, at the top of the Color tab, picks how your scan is printed. ONI is the app's own conversion with ONI's look. Frontier is the look of Fujifilm's Frontier lab scanner, as measured, laid over the app's inversion.
- A new photo starts on ONI; a photo converted on the Scanner face before ONI existed keeps Frontier.
- The Frontier look is a LUT: Frontier look, in Settings, exports it, uses a file you edited instead, and MEASURED brings the measured one back.
Keys
Three blocks that fold: Density, Color and Look. Each letter is a rail between two keys, one step a click, and each block has its own reset key.
- 0
Darker or lighter. D moves your whole picture half a unit a click, three steps with Shift.
- 0
Toward a colour. C, M and Y each run between two colours, as on a lab scanner.
- 0
Cooler or warmer. TEMP warms or cools your picture; a double click on a name brings it back to 0.
Density
D makes your whole picture darker or lighter, half a unit a click: the key on the left toward dark, the one on the right toward light.
- Shift with either key moves three steps at once; a drag along the rail moves step by step.
- A double click on D brings it back to 0, and so does the block's reset key.
- Every step is counted on the scanner's screen.
- D
- −24 to +24, at rest 0
Color
C, M and Y move the colour of your picture half a unit a click: C toward red or cyan, M toward green or magenta, Y toward blue or yellow, as an operator corrects on a lab scanner.
- Shift moves three steps; a double click on a letter brings it back to 0.
- The block's reset key returns all three letters at once.
- C
- −24 to +24, at rest 0
- M
- −24 to +24, at rest 0
- Y
- −24 to +24, at rest 0
Look
TEMP makes your picture cooler or warmer, half a unit a click, on a shorter rail than the letters of density.
- Shift moves three steps; a double click on TEMP brings it back to 0.
- TEMP
- −10 to +10, at rest 0
Screen and finish
The machine's screen, and the finish laid after its render. The screen stands where Pro shows the histogram; the finish is the Scanner face's own.
The app's own note on Screen and finish
Contrast bends the print into an S about a middle grey, its ends held. Vignette darkens the corners in stops, without shifting their color; below zero it lightens them. Chrome lays a saturation curve over everything, greying the ends and keeping color in the middle.
The screen
Where Pro shows the histogram, the Scanner face shows its screen: the frame's place on the roll, the machine and the film, the count of every letter, and the finish's readings, CT, VIG and CHR.
- The machine line reads, for example, ONI · NEGA, or FRONTIER · POSI on a slide; B&W on a black and white film, where CHR is left out.
- REMEASURE ROLL lights up on a roll measured before the scanner kept its median: measure it again in Prepare the Roll.
- Under the Details tab the loupe takes the screen's place, as it takes the histogram's on Pro.
Contrast, Vignette and Chrome
The Scanner face has its own Effects block: Contrast, Vignette and Chrome as rails in steps, with a key at each end, read on the screen as CT, VIG and CHR.
- They are the Scanner face's own: Pro's Contrast, Vignette and Chrome stay where you left them.
- Curves, Spectrogram Finishing and the Saturation Curve act on this face too, after the machine's render, and are also kept apart from Pro's.
- The block's reset key returns all three to 0.
- Contrast
- −50 % to +50 %, by 5 %, at rest 0 %; up to +100 % on black and white
- Vignette
- −2.0 EV to +2.0 EV, by 0.1 EV, at rest 0.0 EV
- Chrome
- 0 % to +150 %, by 5 %, at rest 0 %; absent on black and white
The rest of the manual.
Every surface of the app, in the order of your work. From the folder of scans to the exported file.
- ArchiveOpening the folder of your scans, your folders and favourites, the Archive and Projects tabs, a roll's own facts, the Rolls and Labels menus, and the ONI Trash.
- Prepare the RollThe five steps a roll goes through before its frames are edited: film, flat-field, film base, flags, measuring frame, then Measure.
- RollWhat a roll shares: film type, flat-field, source encoding, the manual balance, the levels, dye separation and Balance strength.
- CropThe framing's own Copy and Paste, aspect ratio, straightening, quarter turns and mirrors, and the measuring window.
- ColorAuto White Balance, Temperature and Tint, Lighting, Effects, Curves, the finishing blocks, and Paper Correction on a paper profile.
- DetailsSharpening, chroma denoise and texture, the stages that act on the grain, judged in the loupe at full resolution.
- De-dustThe brush for dust and scratches, its size, and the list of corrections painted on the open photo.
- PresetsThe deck, saving a preset, its eighteen switches and white balance choice, the Settings menu, and Copy and Paste.
- ExportThe export screen: three presets, format, space and paper profiles, size, the HDR hack, each photo's EXIF line.
- Toolbar and menusEvery key of the bar and of the canvas margin, and every menu item with its shortcut.
- The whole manualEvery surface on one page, in the order a roll goes through the app.
- The guideYour first negative converted, step by step.
Convert your first roll tonight.
Add your folder, prepare the roll once, export. Free, and nothing else to install.
- Mac
- macOS 13 or later on Apple Silicon or Intel
- Windows
- Windows 10 or 11 (64-bit)
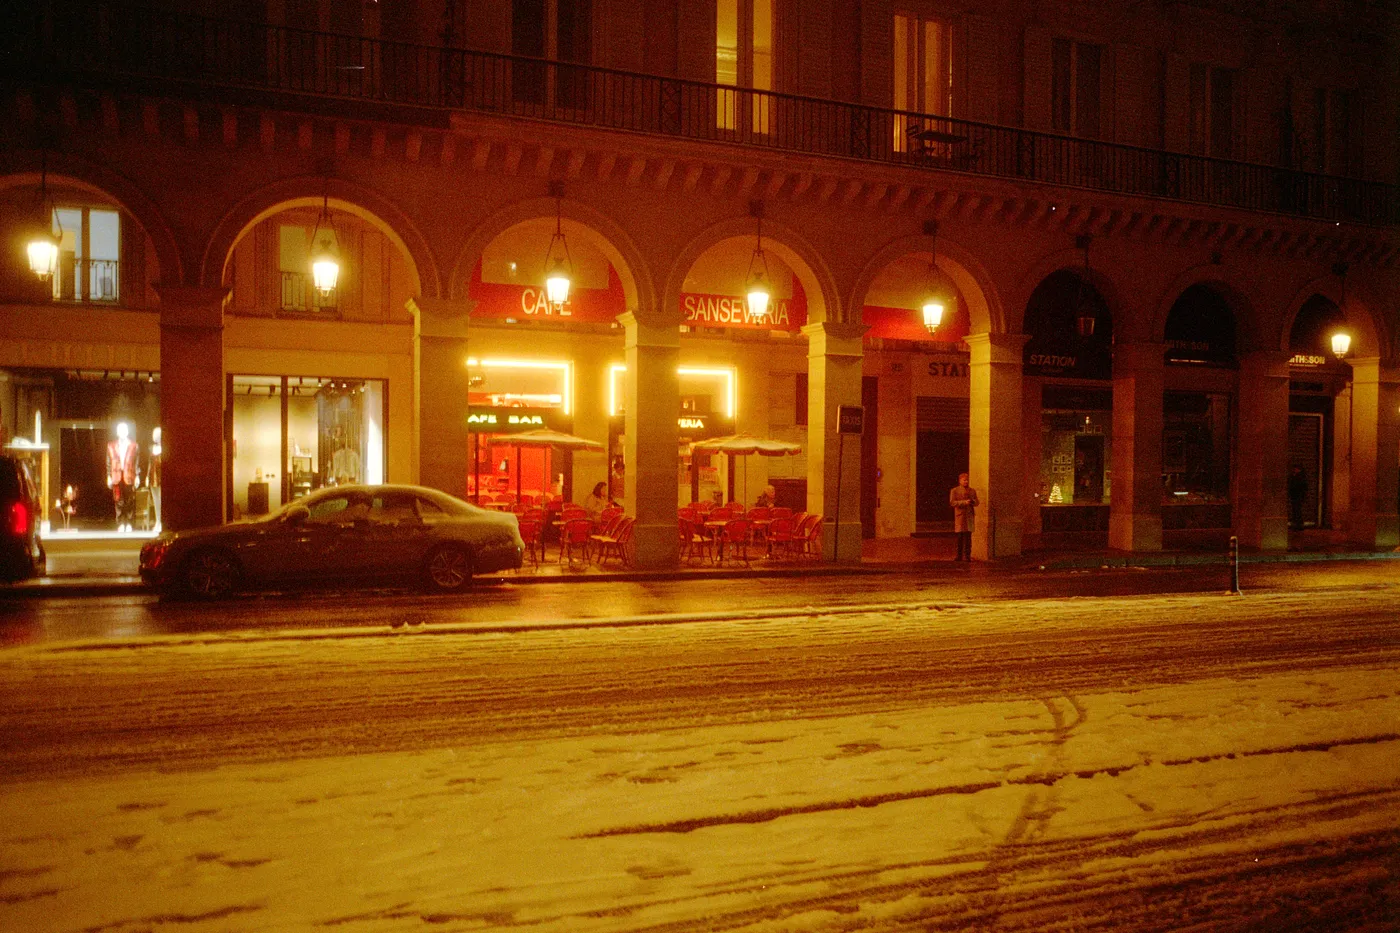
Snow night. Kodak Gold, converted in Open Negative Initiative.