Your whole roll, balanced at once

Every frame, read as one film. Every frame opens on the same reading of your film, so a thin negative and a flat scene keep their difference.

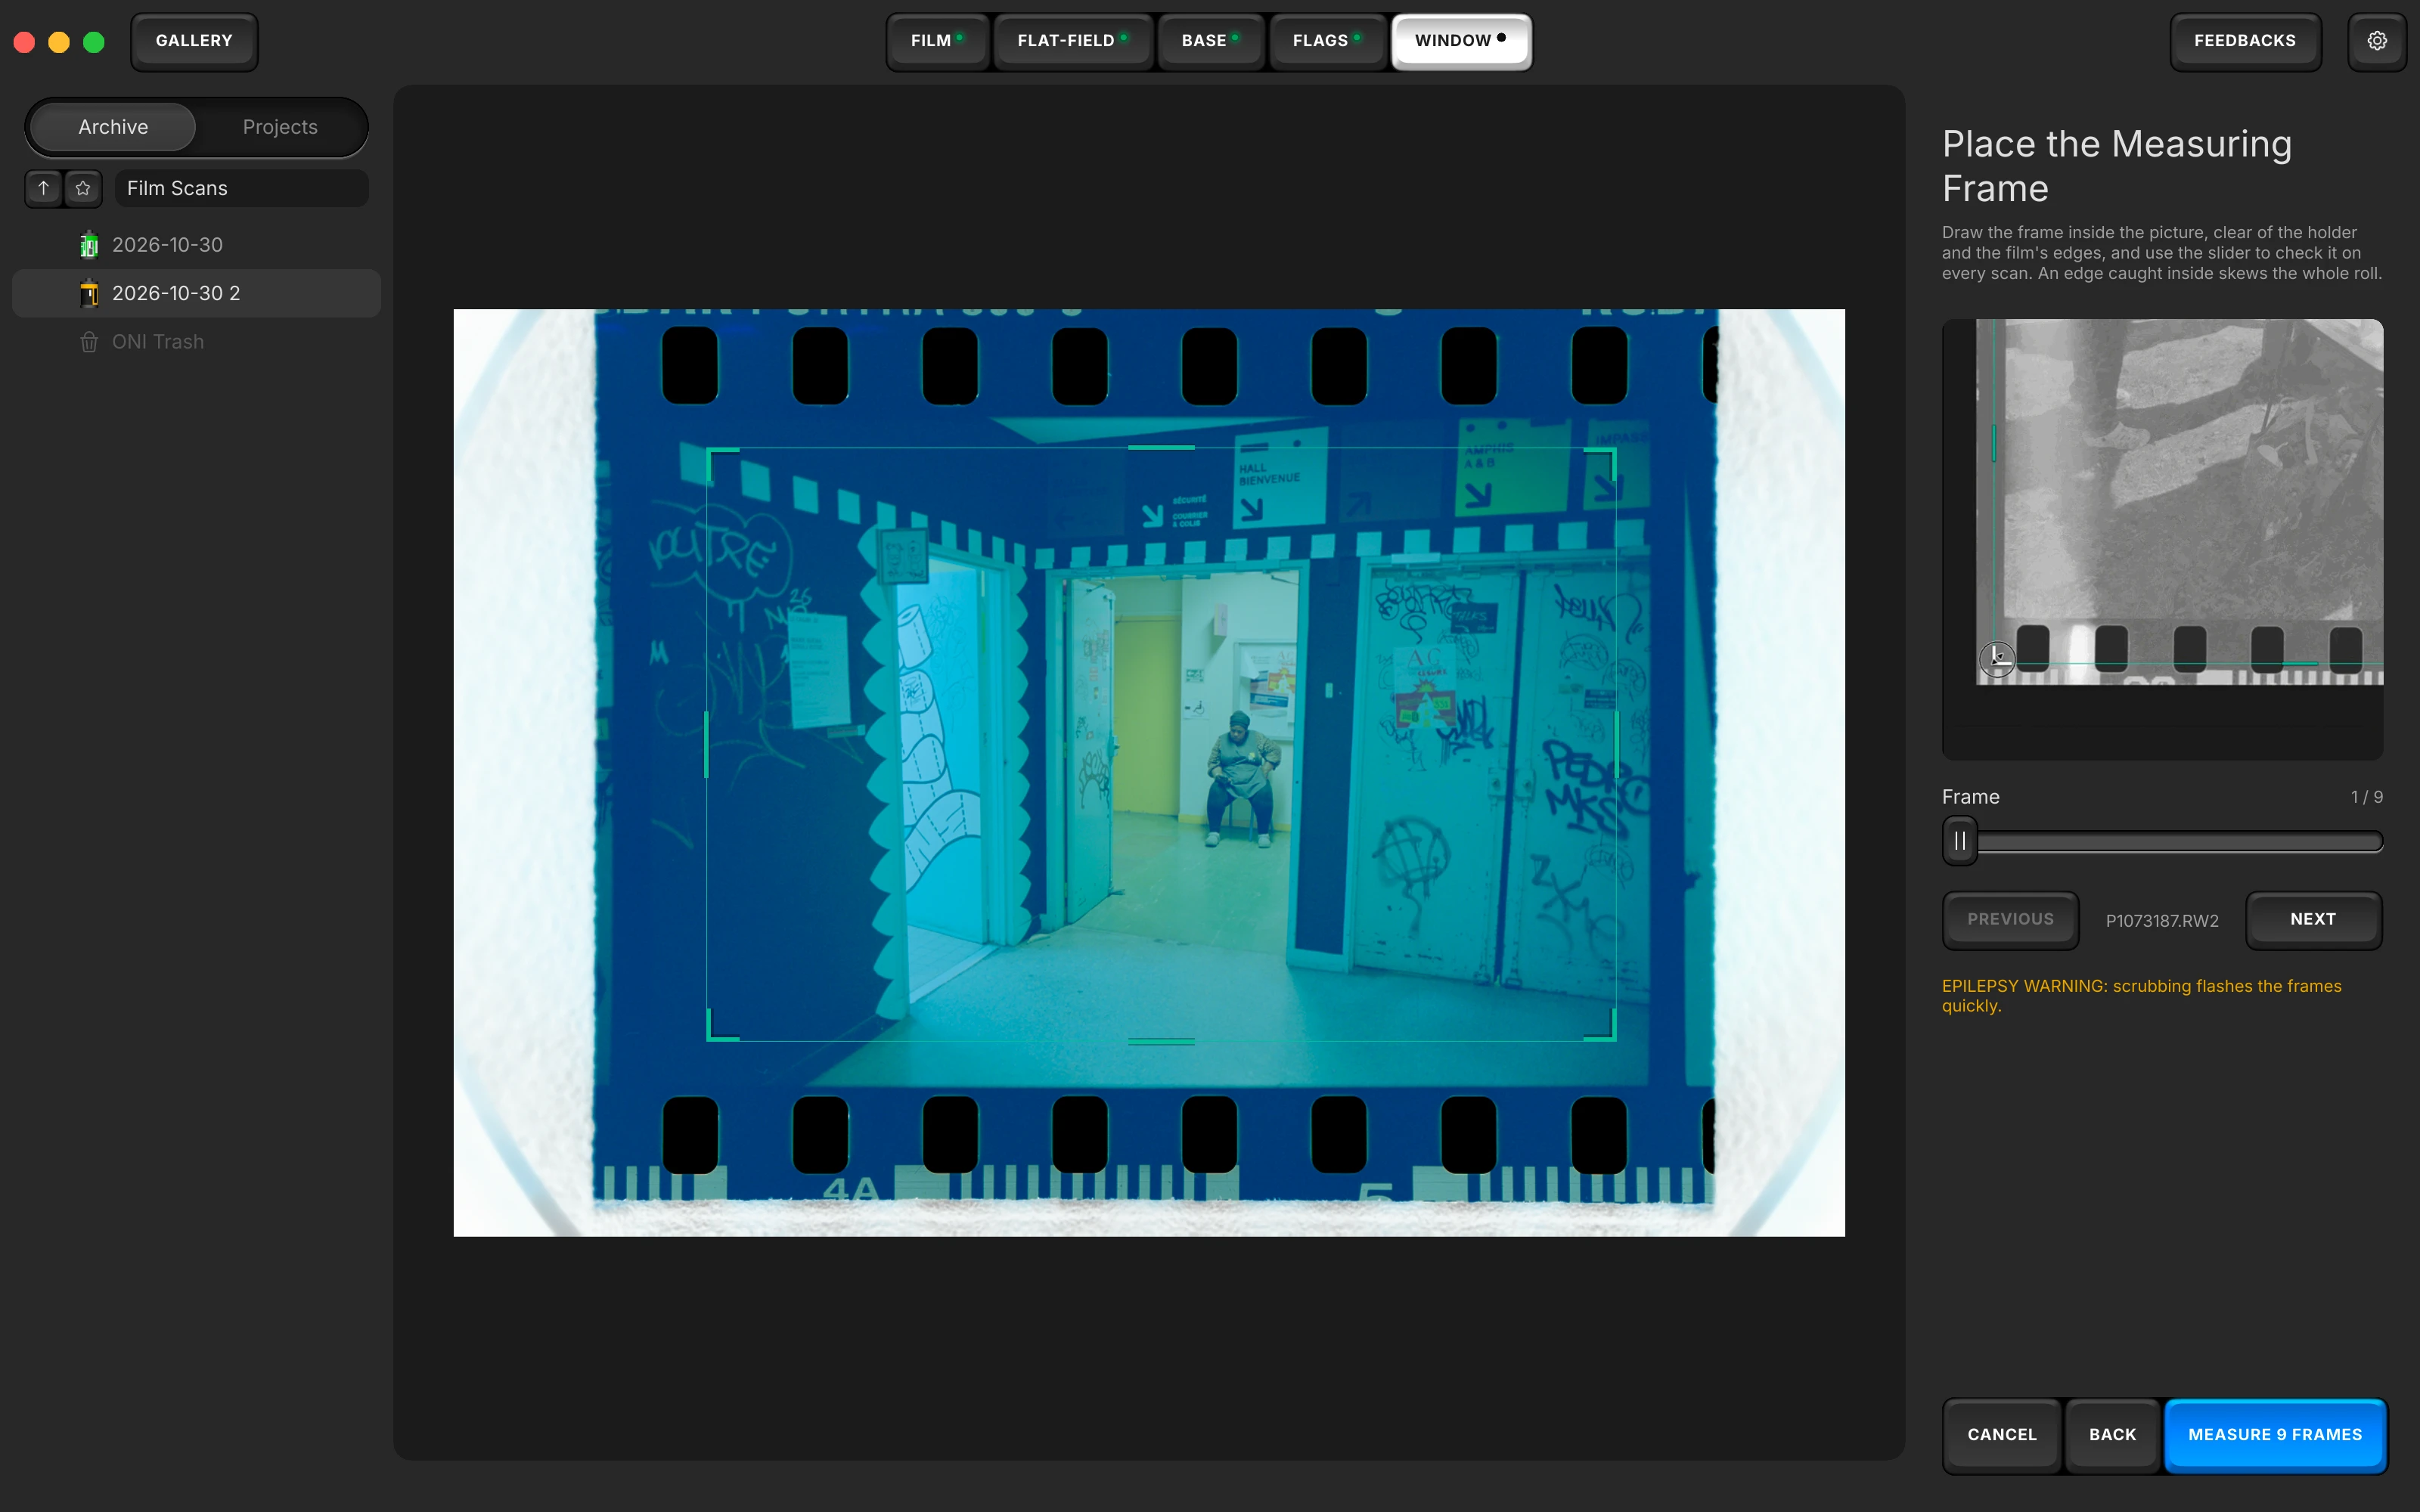
Prepare the Roll on its last step: the measuring frame drawn inside a scan, the Frame slider at 1 / 9 to check it on every scan, and the MEASURE 9 FRAMES key.

From your scans to your roll, in three steps.

Open one film, answer five questions, measure. Prepare the Roll starts from the PREPARE ROLL key of the bar, or from the Rolls menu.

  • Open one film. A roll is one folder: choose Open Folder… in the File menu (⌘O, or Ctrl+O on Windows).

  • Answer five questions. The film, the flat-field, the bare film, the frames to leave out, and one measuring frame for the roll.

  • Measure every frame at once. The key counts the frames it is about to read. Every frame then opens on the roll's window.

Your roll is read as one film.

One window for every frame. A lab scanner balances each frame alone, so a red wall turns grey and a dusk turns blue. Your roll was one film, one development and one digitisation: measured together, its frames keep the colour you shot. Prepare the Roll reads every frame and balances the roll on their median.

Read the research

123456789101112a light leakthe roll's window
Twelve frames, one window. Each bar is one frame's own black and white. The roll's window is read across all of them, near the ends but not on the most extreme frame, so on this roll the light leak of frame 7 does not set it. A diagram on illustrative values; the rule is the app's.
As scannedAfter the two stepsdarkerbrighter
Each frame, read in two steps. Red and blue are brought onto green, then the frame is read again and each channel gets its own black and white: the three channels land on one another. A diagram of the principle.

What it changes when you edit your roll.

The roll holds the film, each frame keeps its light. The Roll tab holds what your frames share; your own look lives in the other tabs.

  • Change it once, for the roll. A setting moved in the Roll tab reaches every photo measured with the roll, each keeping its own look.

  • Correct one frame's light. Auto White Balance, in the Color tab, corrects it with Temperature and Tint, on top of the roll's window.

  • Give your roll one look. Copy a frame's settings, and PASTE TO ROLL lays them on every photo of its roll.

Roll measurement: questions

Light leaks, slides and white balance. The short answers first, then the detail.

What if one frame of my roll has a light leak?

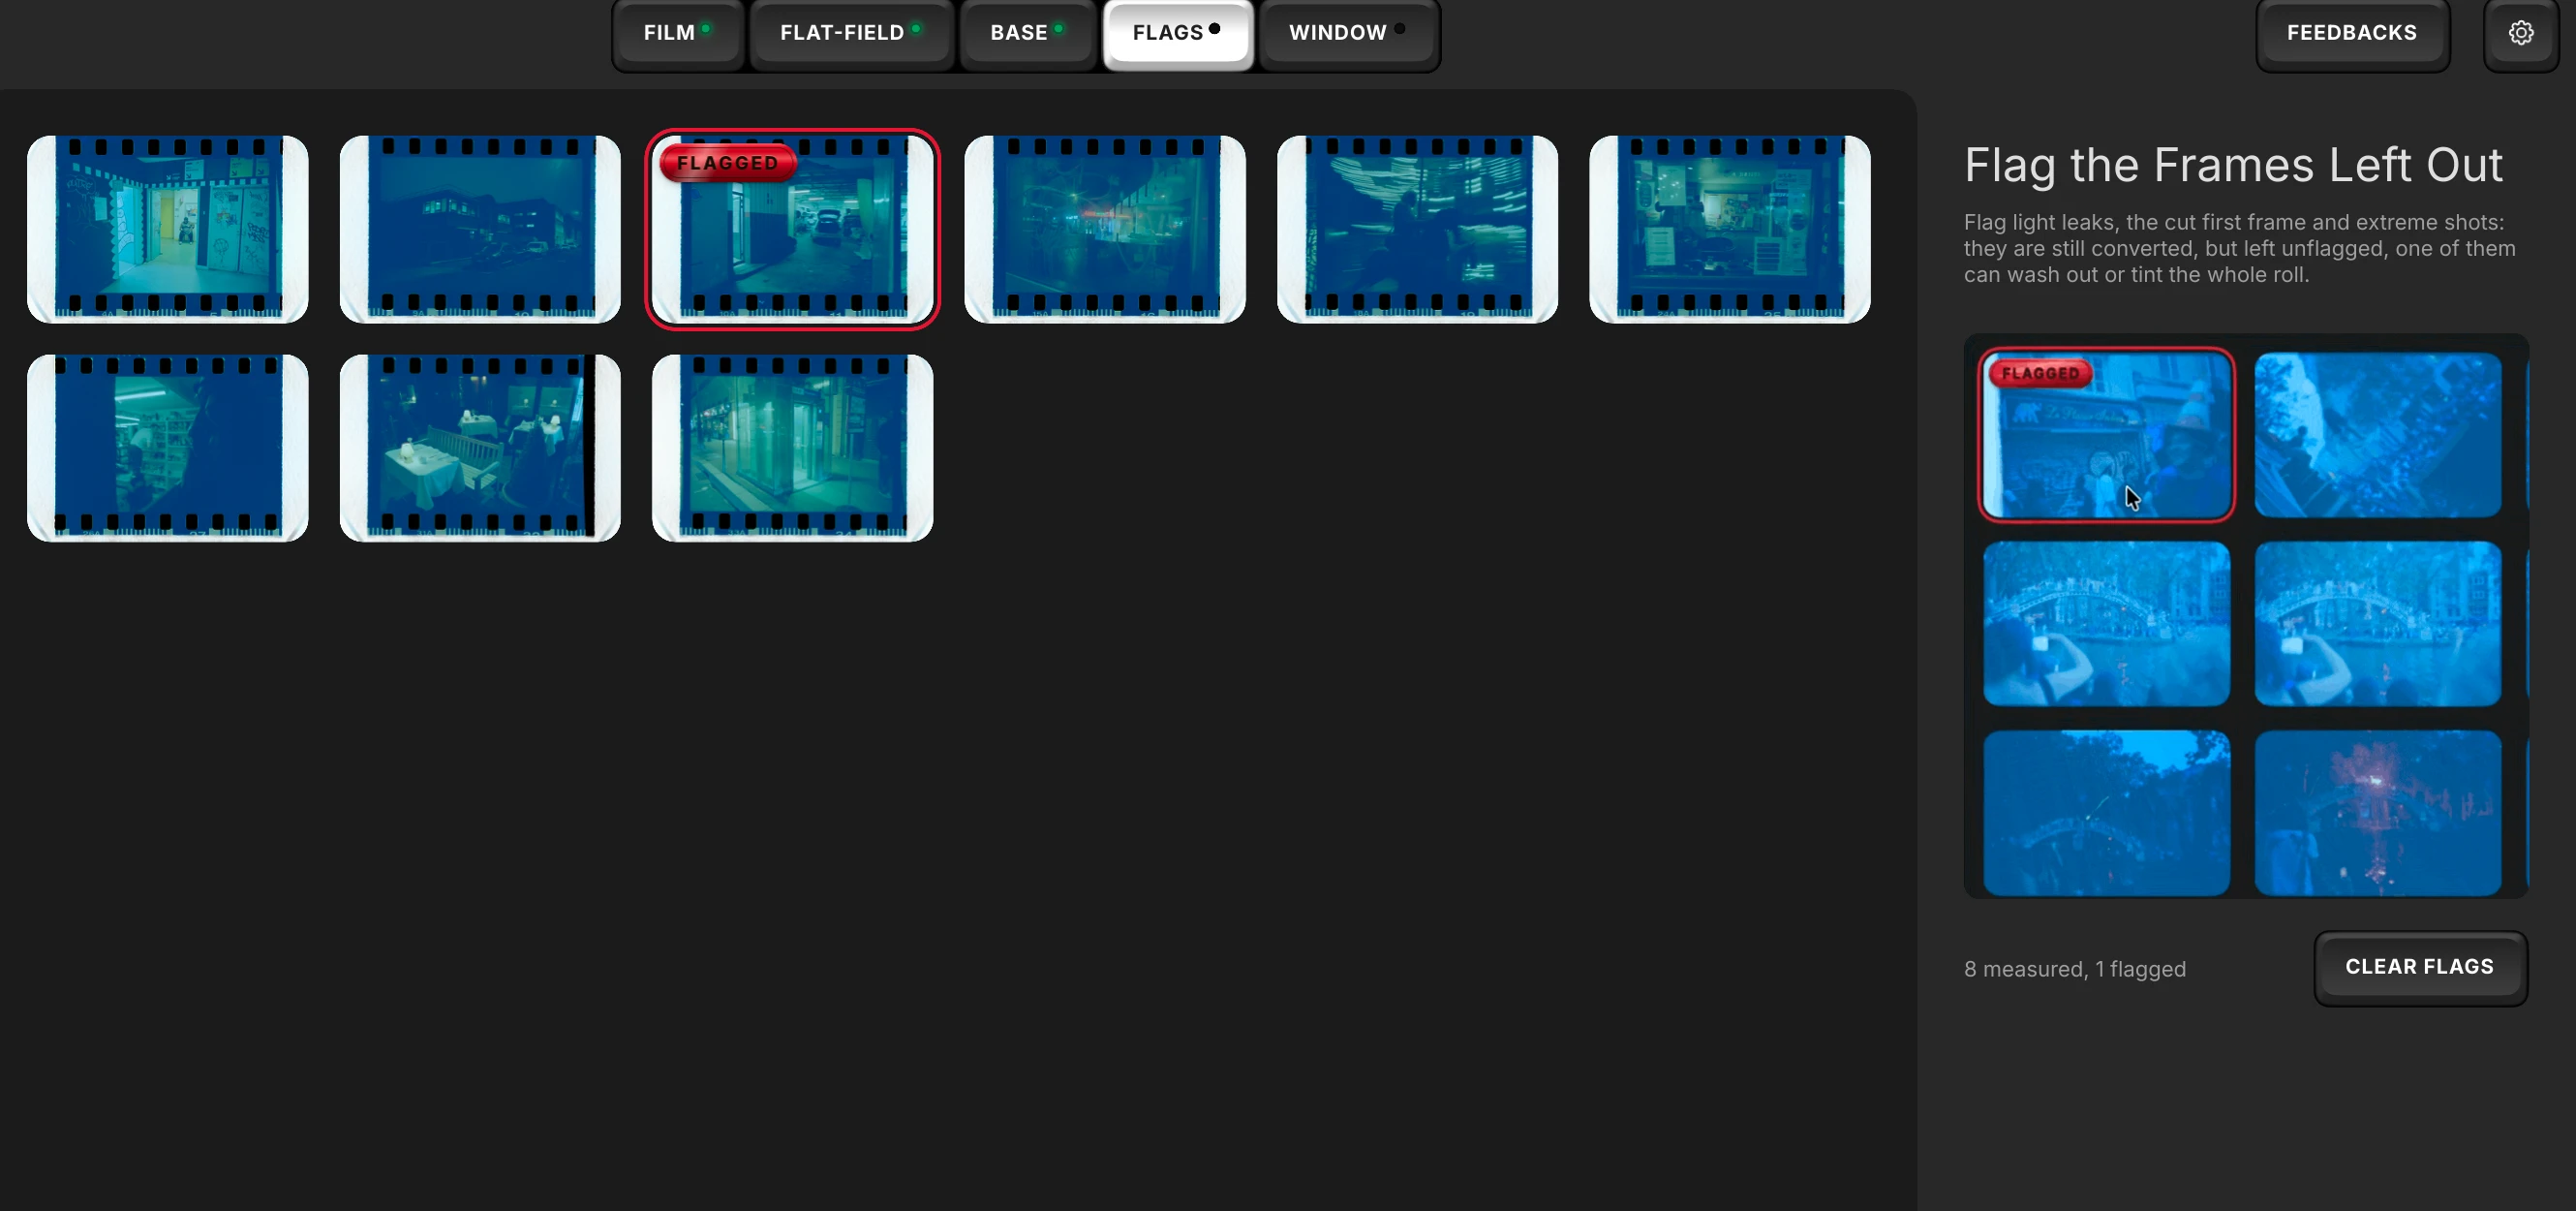
Flag it in the fourth step of Prepare the Roll. A flagged frame is still converted and opens on the roll's window, but it does not count in the measurement. Left unflagged, a light leak can wash out or tint the whole roll.

What if my scans were shot on an automatic mode?

Prepare the Roll reads each frame's shutter speed, aperture and ISO, and marks the frames digitised with other settings than the rest of the roll. Their exposure is evened out to the roll's. A different aperture also changes the vignetting the flat-field measured, so re-shoot those frames in manual for the cleanest roll.

Is there an automatic white balance?

Yes: Auto White Balance, at the head of the Color tab. It reads the light of your frame as it prints and corrects it with Temperature and Tint, while the levels stay where the roll's measurement put them.

Can I balance several frames at once?

Yes. Select them and press Auto White Balance: it asks whether to balance each frame for itself or to give every one the average. Frames shown together take the average, as one look across them.

Why does one area of my photo stay mottled?

Because a channel clipped at the scanner's black level when the frame was scanned: the whole area arrived as one single value, and no setting can pull two different numbers out of one. Scan that frame again, a little brighter.

Does it work for a roll of slides?

Yes. A slide is already a positive, so its blacks and whites stay as you shot them. What drifts across a roll of slides is colour, from the film batch, the lab or the light you scanned on. At the third step, Pick a White or Grey, click something neutral on one slide, a cloud, a wall or the bare light through a sprocket hole: the whole roll takes the gains that turn it grey, its brightness kept. Skip it, and your slides keep the camera's 5500 K.

Does the measurement see my flat-field?

Yes. Every frame is measured through the flat-field you set up in the second step, on the light your panel was evened to.

What does a flagged frame look like?

Prepare the Roll at its FLAGS step: nine thumbnails of the roll, the third one marked FLAGGED in red; the panel beside them reads 8 measured, 1 flagged.
One frame flagged on a roll of nine. Frame 4, P1073193, at the FLAGS step of Prepare the Roll: 8 measured, 1 flagged. No light leak on these frames: it is an extreme shot, a night frame whose thin negative strays furthest from the rest.

What do converted frames look like?

See all sixteen conversions, real photographs converted in Open Negative Initiative, each with its raw scan.

Convert your first roll tonight.

Add your folder, prepare the roll once, export. Free, and nothing else to install.

How to convert a film negative, step by step

Mac
macOS 13 or later on Apple Silicon or Intel
Windows
Windows 10 or 11 (64-bit)

Blocked at first launch?

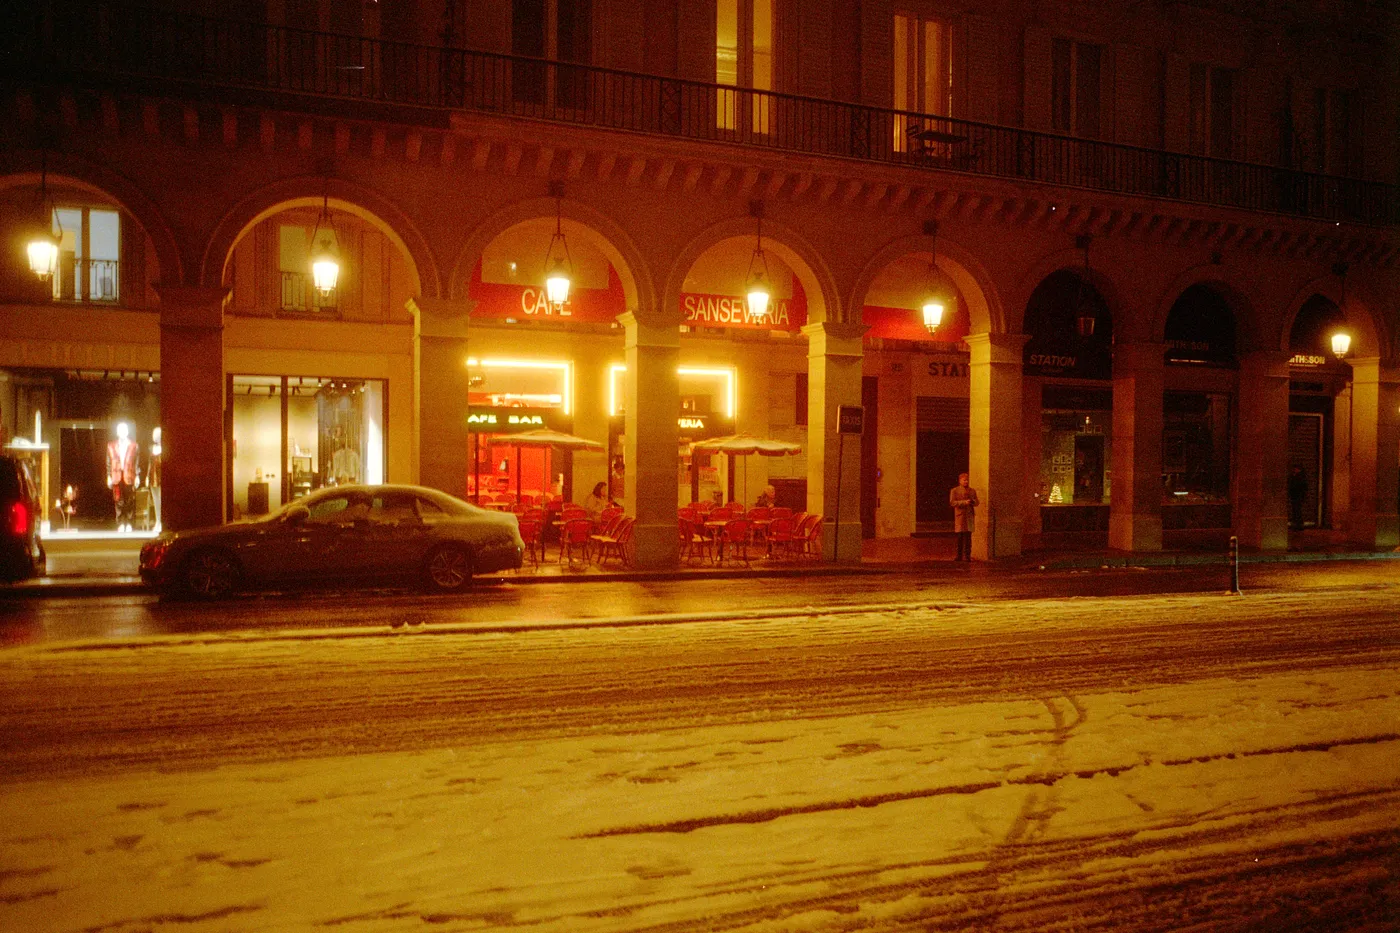
A snowy Paris street at night, a lit cafe under arcades, tyre tracks in the snow.

Snow night. Kodak Gold, converted in Open Negative Initiative.

The research.

One film, one development, one scan. What a roll shares, what each step of Prepare the Roll asks of you, and why your colour holds from the first frame to the last.

What changesWhat it movesRead
The emulsion batchColour and contrastOnce, for the roll
The film's age, and heat in storageContrast, and a lean toward one colourOnce, for the roll
The developer's temperature and timeColour and contrastOnce, for the roll
A push or a pullColour and contrastOnce, for the roll
The light of your scanner or camera setupColourOnce, for the roll
The light each scene was shot inThat frame's colourFrame by frame, by Auto White Balance
What a roll shares, and what is your photograph. Every row but the last moves every frame of the roll at once, so it is measured once, for the roll. The light of each scene is the frame's own.

Why measure the whole roll

A frame alone cannot say where its white would have been. A thin negative and a flat scene hand a converter the same data, so a frame balanced on its own pulls both towards the same picture, and the difference that made one of them thin is lost.

A roll can say it, because a roll is one film, one development and one digitisation. Read together, its frames show what is the film and what is the scene: the window shared by all of them is the film, and what one frame does differently is your photograph.

Two rolls of the same film never come out of the tank identical. The emulsion batch, how old the film was, the developer's temperature and time, a push or a pull: each shifts the colour and the contrast of the whole roll at once. The light of your scanner or your camera setup adds its own shift on top. Expired film drifts further still: as it ages it loses contrast and leans toward one colour, more so after a summer in a warm drawer.

All of it is shared by every frame of the roll, so it is measured once, for the roll, and the Roll tab holds the result. Start a new roll, and Prepare the Roll reads it afresh.

70 %80 %90 %100 %Light, against the centreedgecentreedgeAcross the frame, from edge to edgeThrough the flat-fieldAs scanned
The empty light panel, edge to edge. On an illustrative setup, the edges of every scan get 70 % of the centre's light. Through the flat-field, the whole frame reads as even.

Even out your light first

A light panel is rarely even, and a macro lens darkens its own corners: the edges of every scan come out darker, sometimes tinted. On a negative, darker means denser, and the corners of your photo print lighter than the centre.

Shoot the empty light panel once, with the setup you scanned the roll with, and click it at the second step, Set Up the Flat-Field. That shot becomes the flat-field: it evens out the light whatever you crop to, and every frame is measured through it. Skip it when your light is even, as a scanner's usually is.

The picture: not hereBetween two framesOr the rebate
Where the bare film is. A diagram of a strip of 35 mm film: the gaps between the frames and the rebate along the sprocket holes are bare film, orange mask and nothing of the picture. Click there at the BASE step.

Pick the bare film

Every colour negative carries its orange mask on clear film, between the frames and along the rebate. That bare film is the scene's zero: nothing of the picture is in it.

At the BASE step, choose a scan and click the border or the gap between two frames, under the loupe; Picker Size sets how wide an area it reads. Click well clear of the picture, because a click on the image shifts the blacks and colours of the whole roll. Skip the step, and the black is read across the roll's frames.

1.01.52.0Red gain1471012Framea light leakthe average, 1.08the median, 1.00
One leak, two ways to read a roll. The red gain of twelve frames on an illustrative roll, frame 7 fogged by a light leak. The average follows it up to 1.08; the median stays with the roll, at 1.00.

Light leaks and extreme frames

A light leak is light that reached the film outside the exposure: a worn door seal, a back opened too early, the first frame fogged while loading. Once converted, it shows as an orange or red flare. An extreme frame is a real photograph that strays far from the rest, a night shot or a frame into the sun.

Flag them at the fourth step, Flag the Frames Left Out. They are still converted, and they open on the roll's window, without counting in its measurement: left unflagged, one of them can wash out or tint the whole roll.

An average follows its strangest member: one frame fogged orange pulls the whole roll toward orange. A median is the middle value once the frames are sorted, so it follows the roll, and a stray frame only moves it by one place.

That is why the roll's gains are each channel's median across its frames, and why the window's ends are read with the extremes trimmed. Flagging still matters for a roll with several strays, or a short one, where each frame weighs more.

Keep the sameWhy
The light panel, at one brightnessA brighter scan would read as a thinner negative
The lens and its distanceThe flat-field measured that lens, at that distance
The holderIts edges stay outside the one measuring frame
Shutter speed, aperture and ISO, in manualEach scan then says how dense its frame really was
The camera's white balance, fixedAn automatic one shifts the colour from frame to frame
Room light off the film, the LED panel warmed upOnly the film's own differences reach the scans
One sitting, one setup. What to keep the same from the first frame of the roll to the last, with the flat-field shot taken in the same sitting.

Keep your setup still for the whole roll

The roll's measurement trusts that every frame was digitised the same way. Scan the whole roll in one sitting: the same light panel at the same brightness, the same lens and distance, the same holder, the same exposure, with the camera's own white balance fixed rather than automatic. Let an LED panel warm up first, and keep room light off the film.

Then the only differences left between your scans are the ones on the film, which is exactly what Prepare the Roll reads, and its measurement takes the roll's own drift off before you edit a single frame. The flat-field shot belongs to that same sitting, so take it before you move anything.

A camera on aperture priority or auto ISO picks a new exposure for every frame, and a dense negative gets more light than a thin one: the scans no longer say how dense each frame really was. Prepare the Roll reads each scan's shutter speed, aperture and ISO, marks the frames digitised with other settings than the rest, and evens their exposure out to the roll's.

A different aperture also changes the vignetting the flat-field measured, so the cleanest roll comes from one manual exposure, kept from the first frame to the last.

The holderYour measuring frame, cut into cellsa speck of dust
Cells, each read at its median. A diagram of the principle: the measuring frame stays clear of the holder and the film's edges, and a speck of dust under part of one cell leaves that cell's median where it was.

Where the measurement reads

Inside the measuring frame you draw at the last step, clear of the holder and the film's edges; the Frame slider runs every scan under it so you can check it on each one. An edge caught inside skews the whole roll.

The frame is cut into small cells, each read at its median: a speck of dust under half a cell never counts, and an extreme has to cover an area to count. With a film base picked, the bare film is every channel's black. A channel clipped at the scanner's black level is beyond any setting: that frame wants scanning again, a little brighter.

What is readHow
Each frame, step oneRed's and blue's medians brought onto green's with a gain, never past the window's ends
Each frame, step twoEach channel's black and white placed at those gains
The roll's gainsEach channel's median across its frames
The colour of each endA median with a tenth of the frames left out at each end
The depth of the blackA fifth of the way in, the frames sorted darkest first
The depth of the whiteFour fifths of the way in
A flagged frameTakes the window, and stays out of the count
The rules of the measurement. Each frame is read in two steps; the roll's window is read across every frame that counts.

Each frame, read in two steps

A scanned negative leaves its three channels in different places and over different spans. Step one brings red's and blue's medians onto green's with a gain, the job a darkroom enlarger's colour head does with its lamp, never past the window's ends.

Step two then places each channel's black and white at those gains: the three channels land on one another, ready for your edit.

The roll's gains are each channel's median across its frames. The colour of each end comes from a median with the most extreme frames left out, a tenth at each end; its depth from the frames sorted darkest first, a fifth of the way in for the black and four fifths for the white. A flagged frame takes the window and stays out of the count.

So a few frames' deepest shadows and brightest lights are clipped for the roll's contrast, and the Black point and White point of the Color tab take them back on the frames that need it.

WhereWhat it holdsWhat it reaches
The Roll tabThe measured roll, film type, flat-field, source encoding, source balance, density ceiling, per-channel levels, dye separation and Balance StrengthEvery photo measured with the roll
The Crop, Color and Details tabsYour own lookThat frame, on top of the roll
A photo left out of the measurementIts own settings, until JOIN THE ROLLThat photo alone
The roll's settings, and yours. A setting in the Roll tab reaches every photo measured with the roll; your look stays frame by frame.

What the roll shares, and what each frame keeps

The Roll tab holds what the roll shares: the measured roll, the film type, the flat-field, the source encoding, the source balance, the density ceiling, the per-channel levels, the dye separation and Balance Strength. Moved on one photo, a setting there reaches every photo measured with the roll, each keeping its own look.

Your own look lives in the other tabs, frame by frame, and sits on top of what the roll shares: a frame edited before a change in the Roll tab keeps its edit after it.

A photo of the folder that was left out of the measurement says so in the Roll tab, where its settings act on it alone. JOIN THE ROLL gives it the roll's measurement and settings, its own look kept; ROLL OF THE, followed by a count, makes the photos measured together a roll of their own.

PREPARE THE ROLL…, in the same tab, opens the measurement, and a Prepare the Roll you leave halfway picks up at the step where you stopped.

0.250.500.75Channel's mean1246810The power of the meanAverageAuto White BalanceRedBlue
Why the bright areas weigh more. An illustrative frame: a large warm subject, shadows, and a few bright neutral areas. A plain average reads red 1.5 times as strong as blue and would cool the subject; the sixth-power mean of Auto White Balance reads them within 6 % of each other, close to the bright neutrals.

Auto White Balance, on top of the roll

The roll holds the film's colour; what changes from frame to frame is the light the scene was shot in. Auto White Balance reads it by Shades of Gray: each channel's sixth-power mean of the rendered frame, its bright areas weighing more than a large warm subject, brought onto green's by Temperature and Tint. Those two move the colour alone, never how light your photo is.

Balance Strength, in the Roll tab, sets the share of that correction Temperature and Tint take. It starts at 67 %, which keeps a warm evening warm; each photo keeps its own correction, and the share is the roll's.