Colour management for film scans

What you edit is what you export. Your photo is shown in the very space the export writes, from sRGB for the web to the profile of the paper you print on.

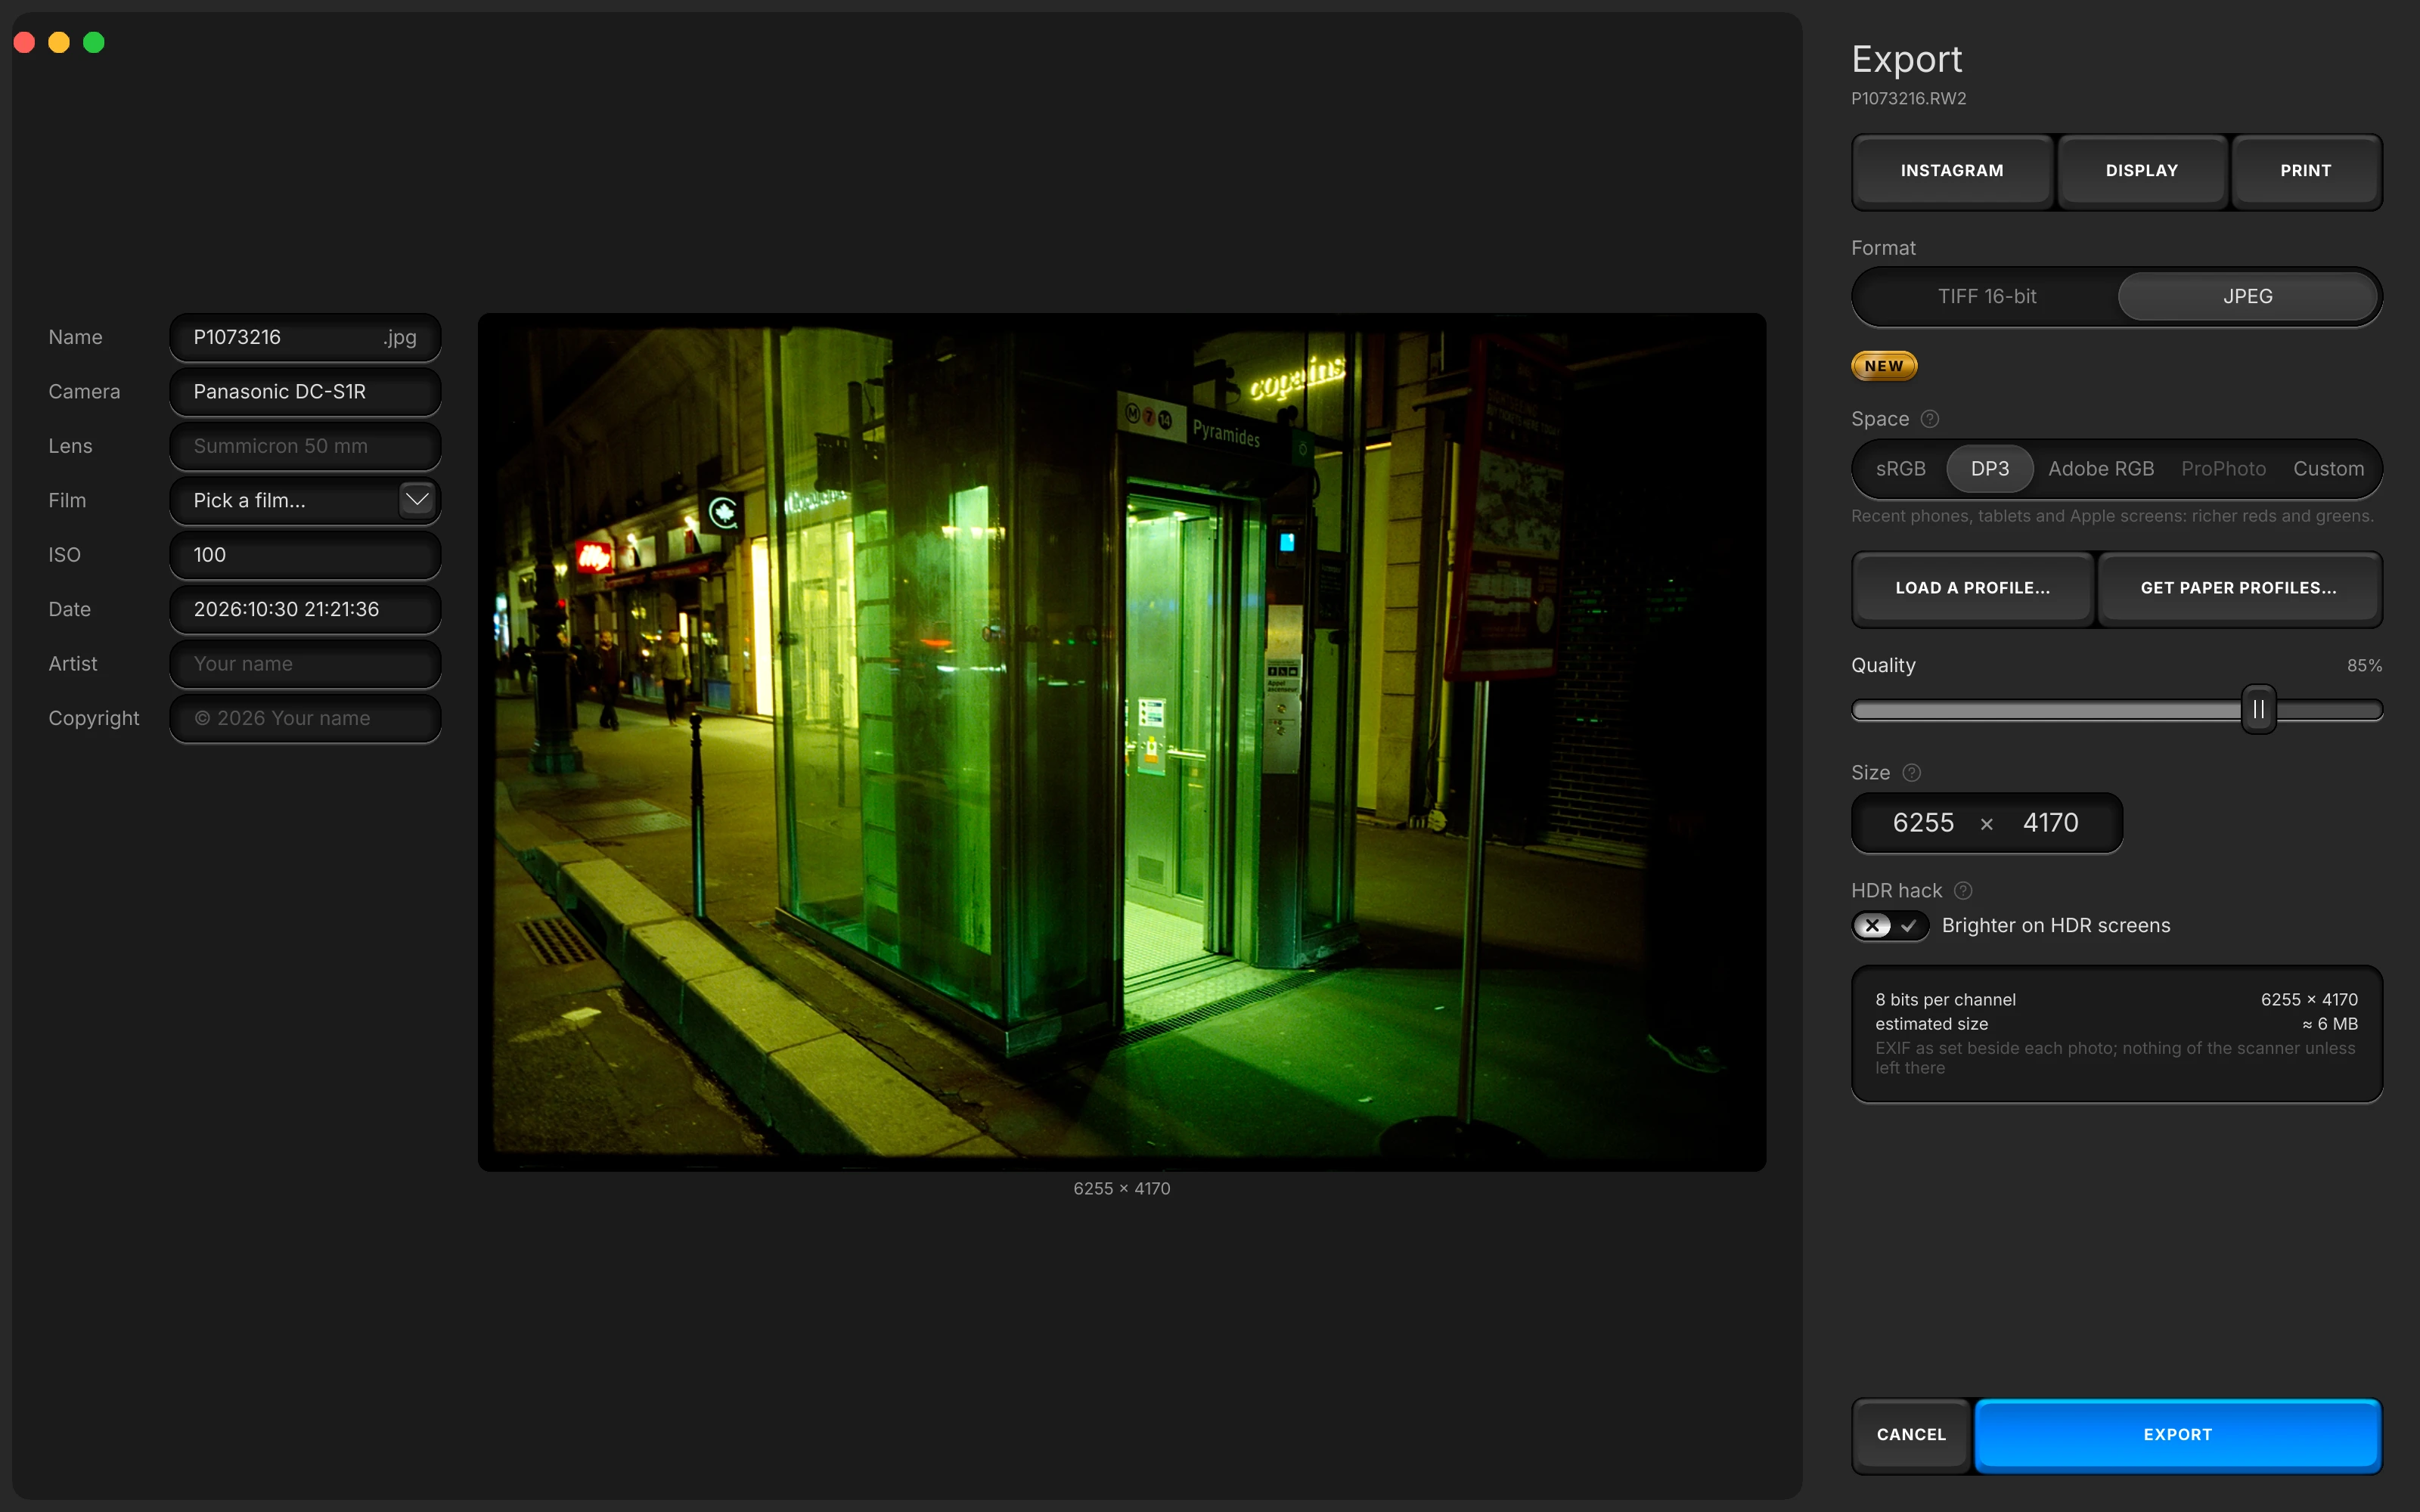
The export sheet: DP3 chosen as the space among sRGB, Adobe RGB, ProPhoto and Custom, with JPEG as the format.

From your screen to your file, in two steps.

Pick where your photo goes, then edit it there. The Working Space chip at the top of your photo and the Space field of the export are the same choice: the file is written in the space you edited in.

  • Pick where your photo goes. sRGB for the web, DP3 for phones and screens, Adobe RGB for a print lab, ProPhoto for a 16-bit TIFF you print at home, Custom for a paper's profile.

  • See what your screen cannot show. Show What This Screen Cannot Show, in the View menu (⇧⌘Y, or Ctrl+Shift+Y on Windows), stripes it.

One space for your canvas and your file.

Your colour, held from the scan to the export. Your lab, your phone and your printer each read colour their own way. Edit in the space your photo is going to, and what you see is what arrives: sRGB for the web, Adobe RGB for a print lab, your paper's profile for home prints. Your photo is worked in one wide space and converted once, into the space you picked, for the canvas and the file alike.

Read the research

whitesRGBDisplay P3Adobe RGBProPhoto RGBRec. 2020 (working)
The colours each space can hold. Each triangle joins a space's red, green and blue on the CIE 1931 chart: your photo is worked in linear Rec. 2020, the dashed one, then shown and written in the space you picked. The primaries are the standards'.

What it changes when you edit your photo.

A print you can see before printing it. And a colour your sliders do not drift.

  • Edit for your paper. On Custom, your photo is converted into the paper's own profile, and the Color tab adds Paper Correction: gains for that paper alone, which Auto Paper Correction sets from the profile, never from the picture.

  • +0

    Your colour, never your brightness. Temperature and Tint move the colour alone, never how light your photo is.

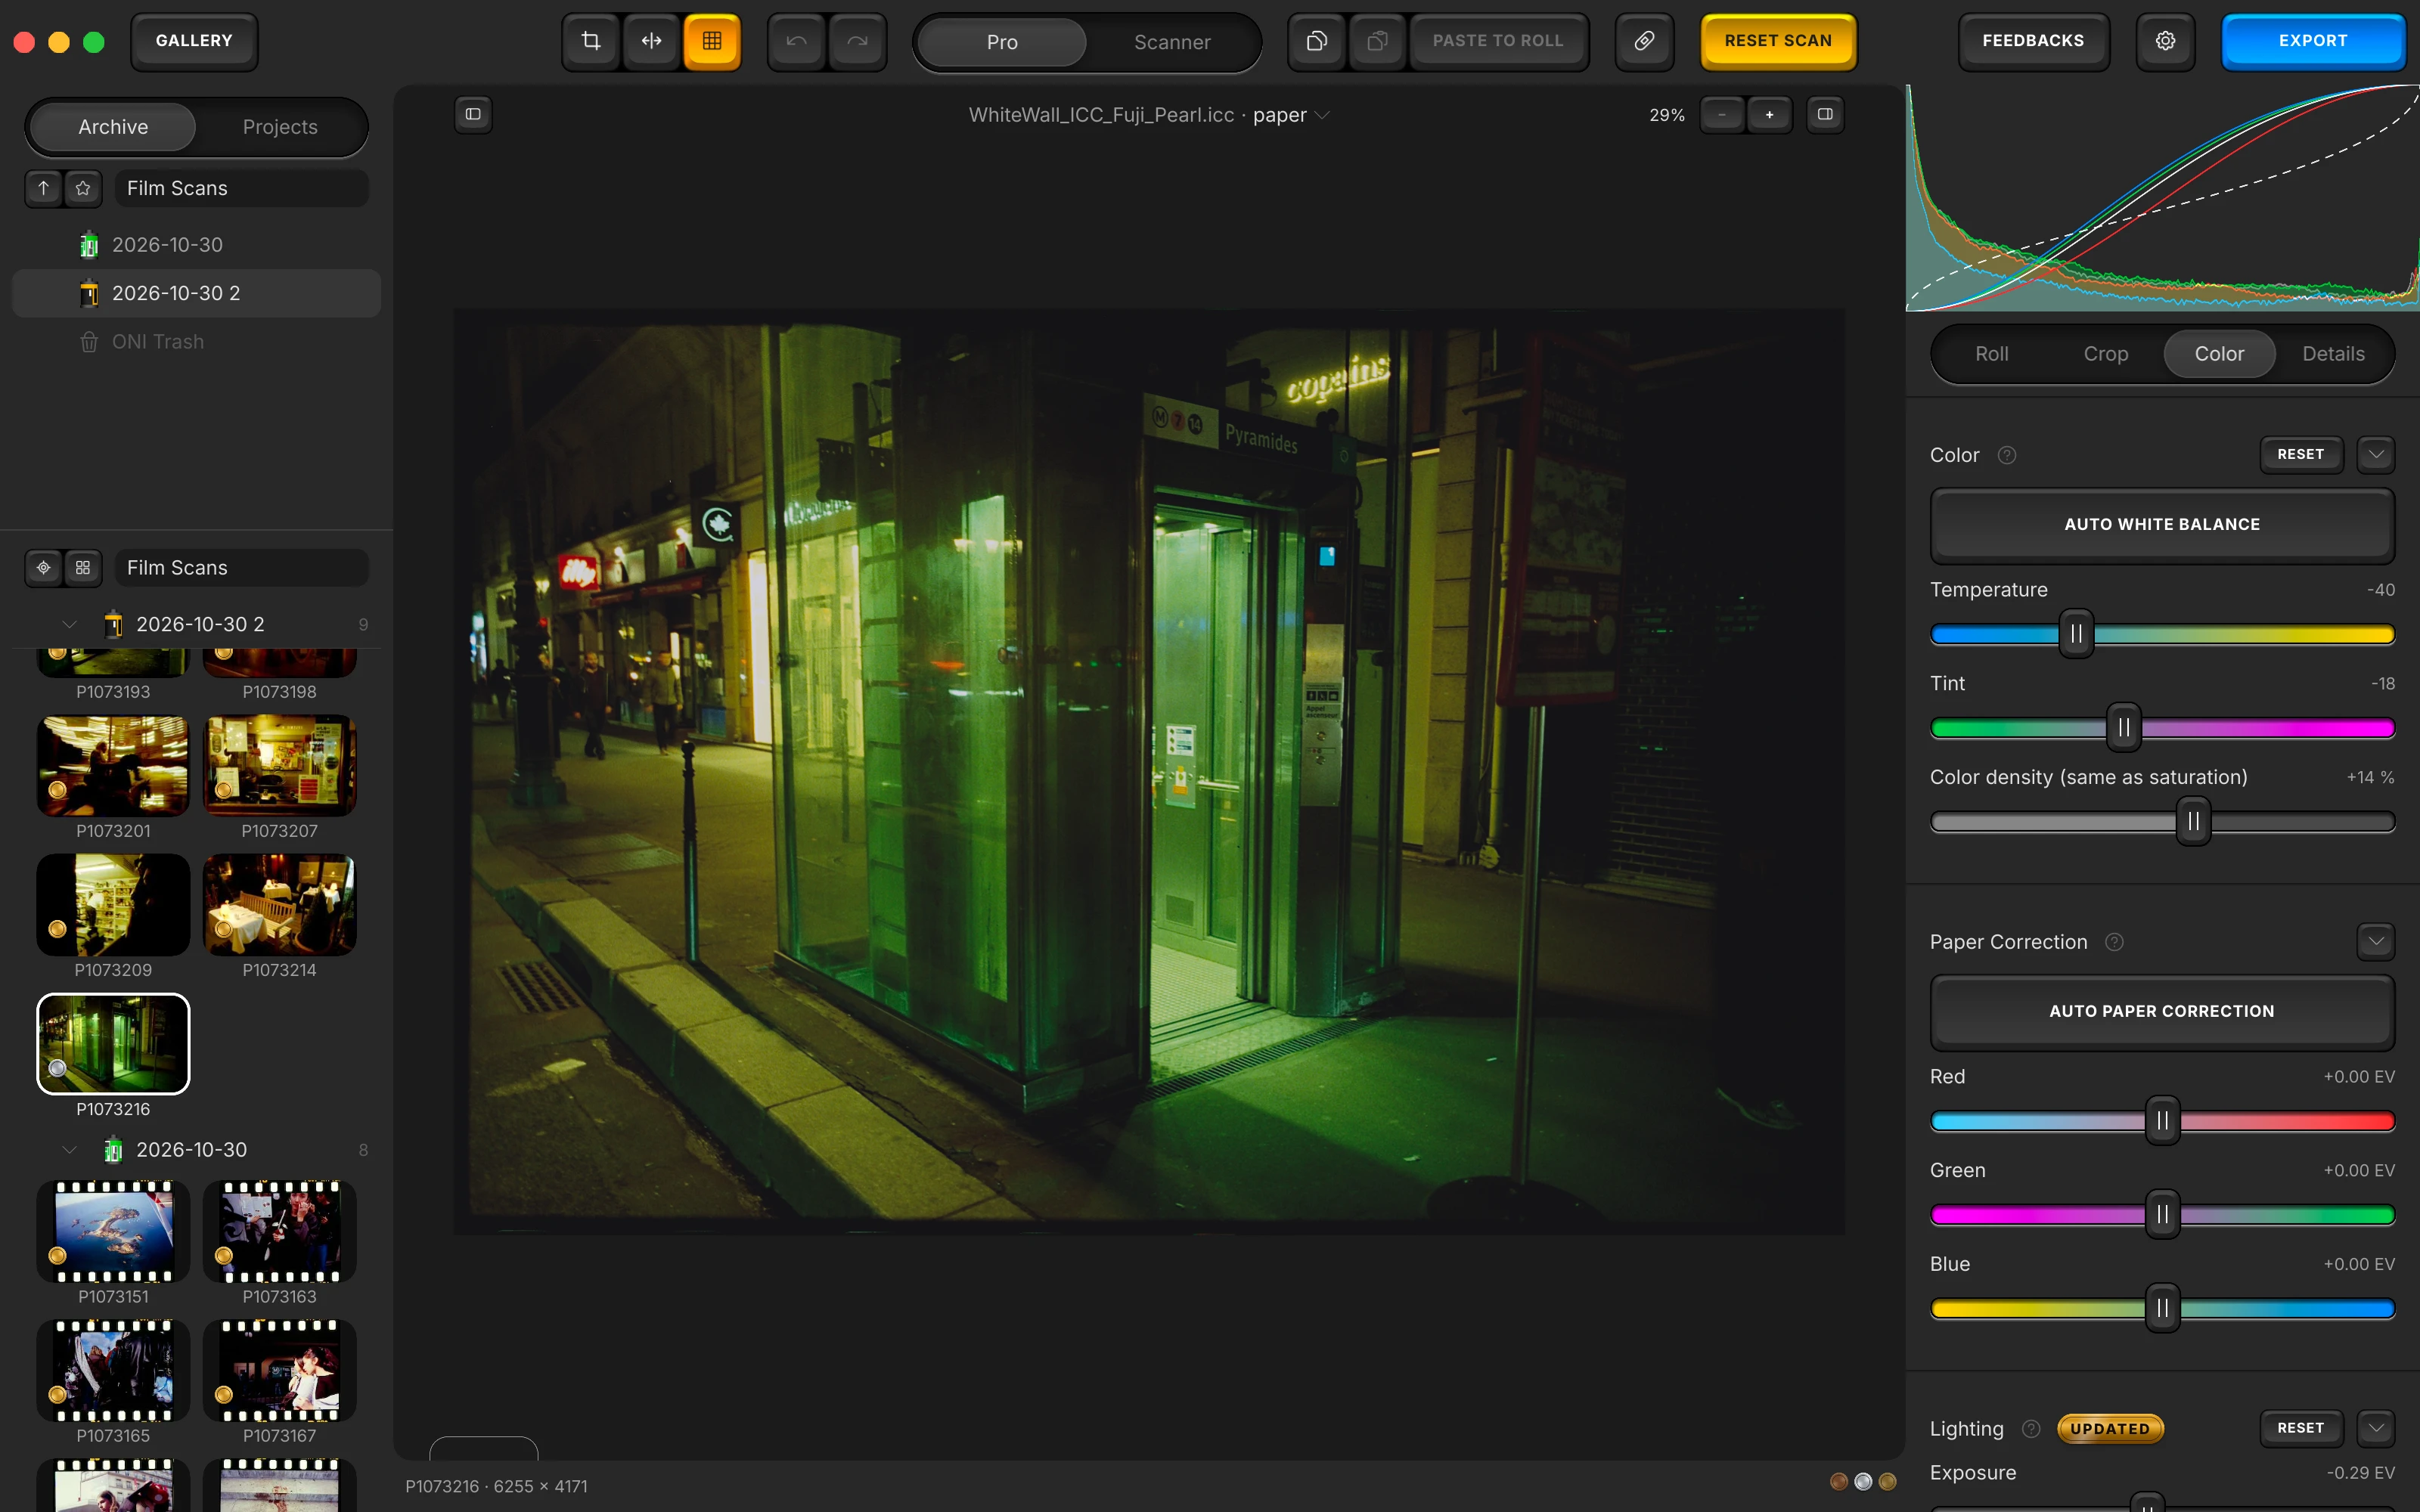
The editor showing a glass lift lit green on a Paris pavement at night, converted into a paper profile: above the canvas, WhiteWall_ICC_Fuji_Pearl.icc, paper; in the Color tab, an Auto Paper Correction key over Red, Green and Blue sliders at +0.00 EV.
Your photo, on the paper's profile. The editor with a WhiteWall Fuji Pearl profile as its space: the canvas header names the paper, and the Color tab gains Paper Correction, its gains still at zero.

Colour management: questions

Spaces, profiles and prints. The short answers first, then the detail.

Why does my photo change when I pick another space?

Because your photo is edited in the space you pick and exported in it. Switch from DP3 to sRGB, and the canvas shows what an sRGB file can hold, which is what the export writes.

Where do paper profiles come from?

From their makers. On Custom, Get Paper Profiles… lists them: some install in one click, others are downloaded on the maker's own page. Load a Profile… then takes the file you downloaded, zipped or not.

What do the stripes on my photo mean?

They are what Show What This Screen Cannot Show, in the View menu, marks: the parts of your photo, in its working space, that the screen you edit on cannot show.

What about a scanner TIFF that carries no profile?

It is read as sRGB until you say otherwise. A scanner's raw output is often linear: pick what the scanning software wrote, under Source Encoding in the Roll tab, sRGB, Linear or Display P3, and the photograph is read again.

Does every camera decode the same way?

Yes. A camera RAW is decoded with its settings pinned and its channels balanced on one constant white, never the camera's own, so no camera's default moves your conversion.

Does the HDR hack change my photo?

No pixel. Brighter on HDR screens, under HDR hack in the export, adds a flat gain map to the JPEG: an HDR screen shows your photo up to two stops above the page's white, and everyone else sees exactly the same photo. JPEG only: no TIFF reader honours a gain map.

Will an 8-bit scan work?

It opens and converts, and the export warns that its shadows may band once inverted: the inversion stretches the low values, where an 8-bit file has the fewest steps.

What do converted frames look like?

See all sixteen conversions, real photographs converted in Open Negative Initiative, each with its raw scan.

Convert your first roll tonight.

Add your folder, prepare the roll once, export. Free, and nothing else to install.

How to convert a film negative, step by step

Mac
macOS 13 or later on Apple Silicon or Intel
Windows
Windows 10 or 11 (64-bit)

Blocked at first launch?

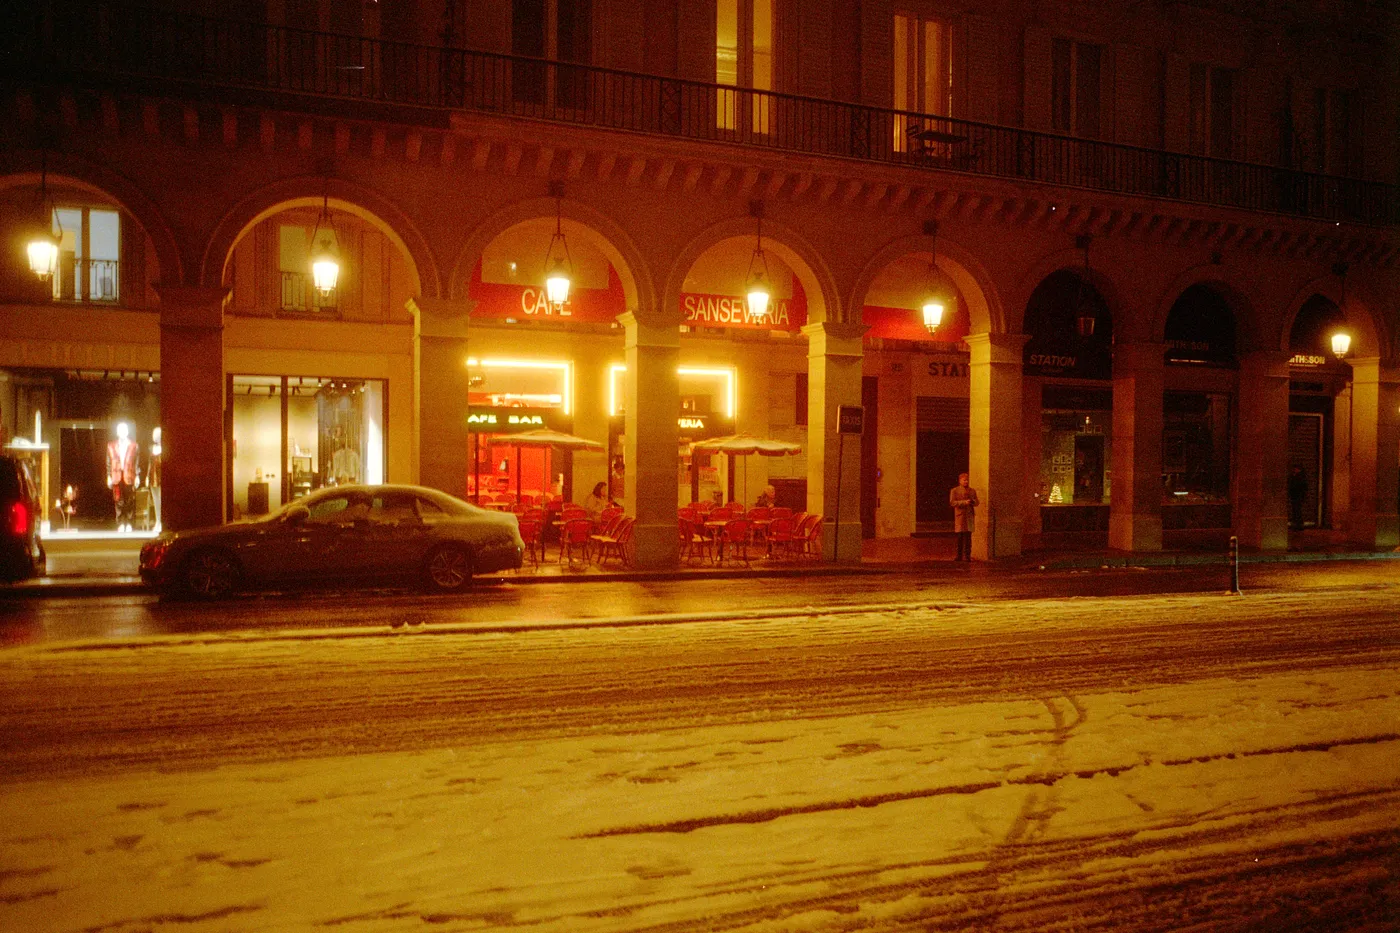
A snowy Paris street at night, a lit cafe under arcades, tyre tracks in the snow.

Snow night. Kodak Gold, converted in Open Negative Initiative.

The research.

From your scan to your file. What a profile is, which space to pick, and what to scan in so the colour holds all the way to the print.

SpaceFull green meansIn CIE 1931 xy
sRGBThe green of most screens0.300, 0.600
Display P3A richer green, for recent phones and screens0.265, 0.690
Adobe RGBA richer green still, toward cyan0.210, 0.710
ProPhoto RGBA green beyond what any screen shows0.160, 0.840
The same three numbers, four different greens. A pixel of full green, 0, 255, 0, names the green of the space it is written in. Each one's position on the CIE 1931 chart, from the standards: the profile is what says which.

What a colour profile does

A pixel is three numbers, and the same three numbers look different on every screen, every printer and every paper. An ICC profile says what those numbers mean on one device: which red is the reddest it can show, which white is its white. Colour management reads the profile of where a photo comes from and the profile of where it goes, and converts once, on purpose, between the two.

For a film scan it starts earlier than for a digital photo, at the decode, and it has to hold through every stage after the roll's measurement: the colour measured on the roll is only right if nothing on the way to the file moves it.

SpaceForWhat it holds
sRGBThe web and social networksWhat every screen reads
Display P3Recent phones, tablets and Apple screensRicher reds and greens
Adobe RGBPrint labs and photo printersRicher cyans and greens
ProPhotoPrinting at home, through the printer's own profileNearly every colour the conversion makes, in a 16-bit TIFF
CustomA paper, or a lab's printerThe colours of that ICC profile
Five spaces, one choice per photo. The Space field of the export, and the Working Space chip above your photo: the same choice.

Which space for which photo

Pick the space by where the photo goes, under the name a lab or a printer will ask for. sRGB is what every screen and app reads: the right choice for the web and social networks. Display P3 holds richer reds and greens for recent phones, tablets and Apple screens.

Adobe RGB holds richer cyans and greens, for print labs and photo printers. ProPhoto holds nearly every colour the conversion makes, for printing at home through the printer's own profile, in a 16-bit TIFF. Custom takes an ICC profile for a paper or a lab's printer.

Ask the lab which space it prints from before you export. Many print from sRGB, some from Adobe RGB, and some publish the ICC profile of their own printer and paper.

With a named space, pick it in the export and edit in it from the first frame. With a profile, choose Custom, then Load a Profile…, which takes the file you downloaded, zipped or not: your photo is shown and written in the lab's own printer space. On Custom, Get Paper Profiles… lists paper makers' profiles, some installed in one click, others downloaded on the maker's own page.

Your fileRead byArrives as
A camera RAWLibRaw, every setting pinned, its channels balanced on one constant whiteScene-linear Rec. 2020, in floating point
A linear scan's TIFFA reader of its ownScene-linear data
Any other file with a profileThe profile it carriesScene-linear data
A file that names no profilesRGB, or the Source Encoding you setScene-linear data
Every file, one way in. The bytes of the file choose its reader, never its extension; every file reaches the conversion as scene-linear data.

How every file is decoded

A density is only a density if the decoded numbers are proportional to the light, so every file reaches the conversion as scene-linear data, whatever wrote it. Its bytes, never its extension, choose the reader.

A camera RAW is demosaiced once by LibRaw, with every setting pinned and its channels balanced on one constant white, and turned into scene-linear Rec. 2020 in floating point: every camera decodes the same way. A linear scan's TIFF has a reader of its own. Anything else is read through the profile it carries, or through the Source Encoding you set.

25 %50 %75 %100 %Light on your screen0 %18 %50 %100 %Light in the sceneRight encodingLinear, read as sRGB
A linear file, read as sRGB. The sRGB curve, from its standard. A scene's mid-grey, 18 % of the light, stored linearly and read as sRGB, shows at 2.7 %: dark and flat. Source Encoding set to Linear reads it as 18 % again.

A scan that names no profile

Scanning software often writes a TIFF without a profile, and sometimes in its raw, linear form: numbers proportional to the light, which look dark and flat when read as an ordinary photo. A file that names no profile is read as sRGB.

If the photograph looks wrong from the start, open Source Encoding in the Roll tab and pick what the scanning software wrote: sRGB, Linear or Display P3. The photograph is read again, and the roll's measurement works on the right numbers.

1/31The value, out01/31A channel's value, inIn floating pointClipped at 1
A strong gain, then brought back. A channel through an illustrative gain of 3, then divided by 3 at a later stage. Clipped at 1 in between, every value above 1/3 comes back as one flat value; in floating point, every value comes back where it was.

Floating point, in linear Rec. 2020

Removing the orange mask of a colour negative takes strong gains on each channel, and a chain that rounds between stages, or works in a narrow space, clips colour long before the export.

So your photo stays in floating point from one stage to the next, in linear Rec. 2020, a space wide enough to hold what those gains produce, and is converted into the space you picked from there, for the canvas and the file alike.

12345678910Stops below white1101001,00010,000Levels in that stop, log scale8-bit16-bit
Levels per stop, in 8 and 16 bits. Counted on a file encoded in sRGB. The brightest stop of an 8-bit file holds 68 levels and the tenth holds 3; a 16-bit file still holds 827 there. A negative's densest areas, your highlights, sit in those low values before the inversion stretches them.

Scan in 16-bit

An 8-bit file holds 256 levels per channel. Inverting a negative stretches the low values of the scan the most, and where a file has few levels to stretch, the steps between them show as bands across smooth tones.

A 16-bit scan holds 65,536 levels and keeps those gradients smooth. The app opens and converts an 8-bit file all the same, says so with a badge in the Per-Channel Levels, and the export flags it: 8-bit source, shadows may band once inverted.

On the paper's profileWhat happens
The colours the paper can printStay as they are
The paper's whiteStands for white
The deepest black of your photoLands on the deepest black the paper holds
Paper CorrectionIts gains, laid last, for that paper alone; on any other space they rest
AUTO PAPER CORRECTIONReads the paper's white off its profile, and sets the gains that print a grey as grey
What happens on a paper's profile. Custom, with a paper's ICC profile, converts relative colorimetric with black point compensation; Paper Correction works on that paper alone.

Seeing the print before you print

A paper holds fewer colours than a screen, and its white is the paper itself. Edited on a screen alone, a saturated red or a deep blue can print flatter than you saw it. Choose Custom and the paper's ICC profile, and your photo is converted into it, relative colorimetric with black point compensation: the canvas shows what that paper can print.

Paper Correction, in the Color tab, then lays its gains last, on a colour or a black and white print alike, against that paper alone: in any other working space they rest. Auto Paper Correction reads the paper's own white off its profile and sets the gains that print a grey as grey.

Adobe RGBsRGB
Adobe RGBsRGB
What an sRGB screen cannot show of Adobe RGB. The two spaces by their primaries on the CIE 1931 chart, from the standards. Edited in Adobe RGB on an sRGB screen, the colours in the shaded band are in your file and on your print; Show What This Screen Cannot Show stripes them on your photo.

Your screen has limits too

Most screens show sRGB or Display P3, and a wide space such as Adobe RGB or ProPhoto holds colours beyond them. Those colours are in your file and on your print, and a wider screen shows them stronger.

Show What This Screen Cannot Show, in the View menu, stripes the parts of your photo, in its working space, that the screen you edit on clips. What is striped is the screen's limit, and the file and the print hold those colours all the same.

ControlWhat it movesWhat it leaves
Temperature and TintThe colourHow light your photo is
Auto White BalanceTemperature and Tint, for this frame's lightThe levels the roll's measurement placed
Dye separationEach dye's spill into the other two channelsThe greys
The canvasDrawn through the working spaceThe file, written in that same space
Show What This Screen Cannot ShowStripes what your screen clipsThe colours in your file and on your print
What each control moves, and what it leaves. The roll's measurement sets the colour; nothing after it moves more than it says.

What keeps the colour from drifting

The roll's measurement sets the colour, and what comes after holds it. Temperature and Tint move the colour alone, and Auto White Balance writes into those same two sliders. Dye separation subtracts each dye's spill into the other two channels, so colours separate while greys stay put.

The canvas is drawn through the working space, and the screen's limits are striped on demand. The export page says how to post an HDR JPEG.