Archive
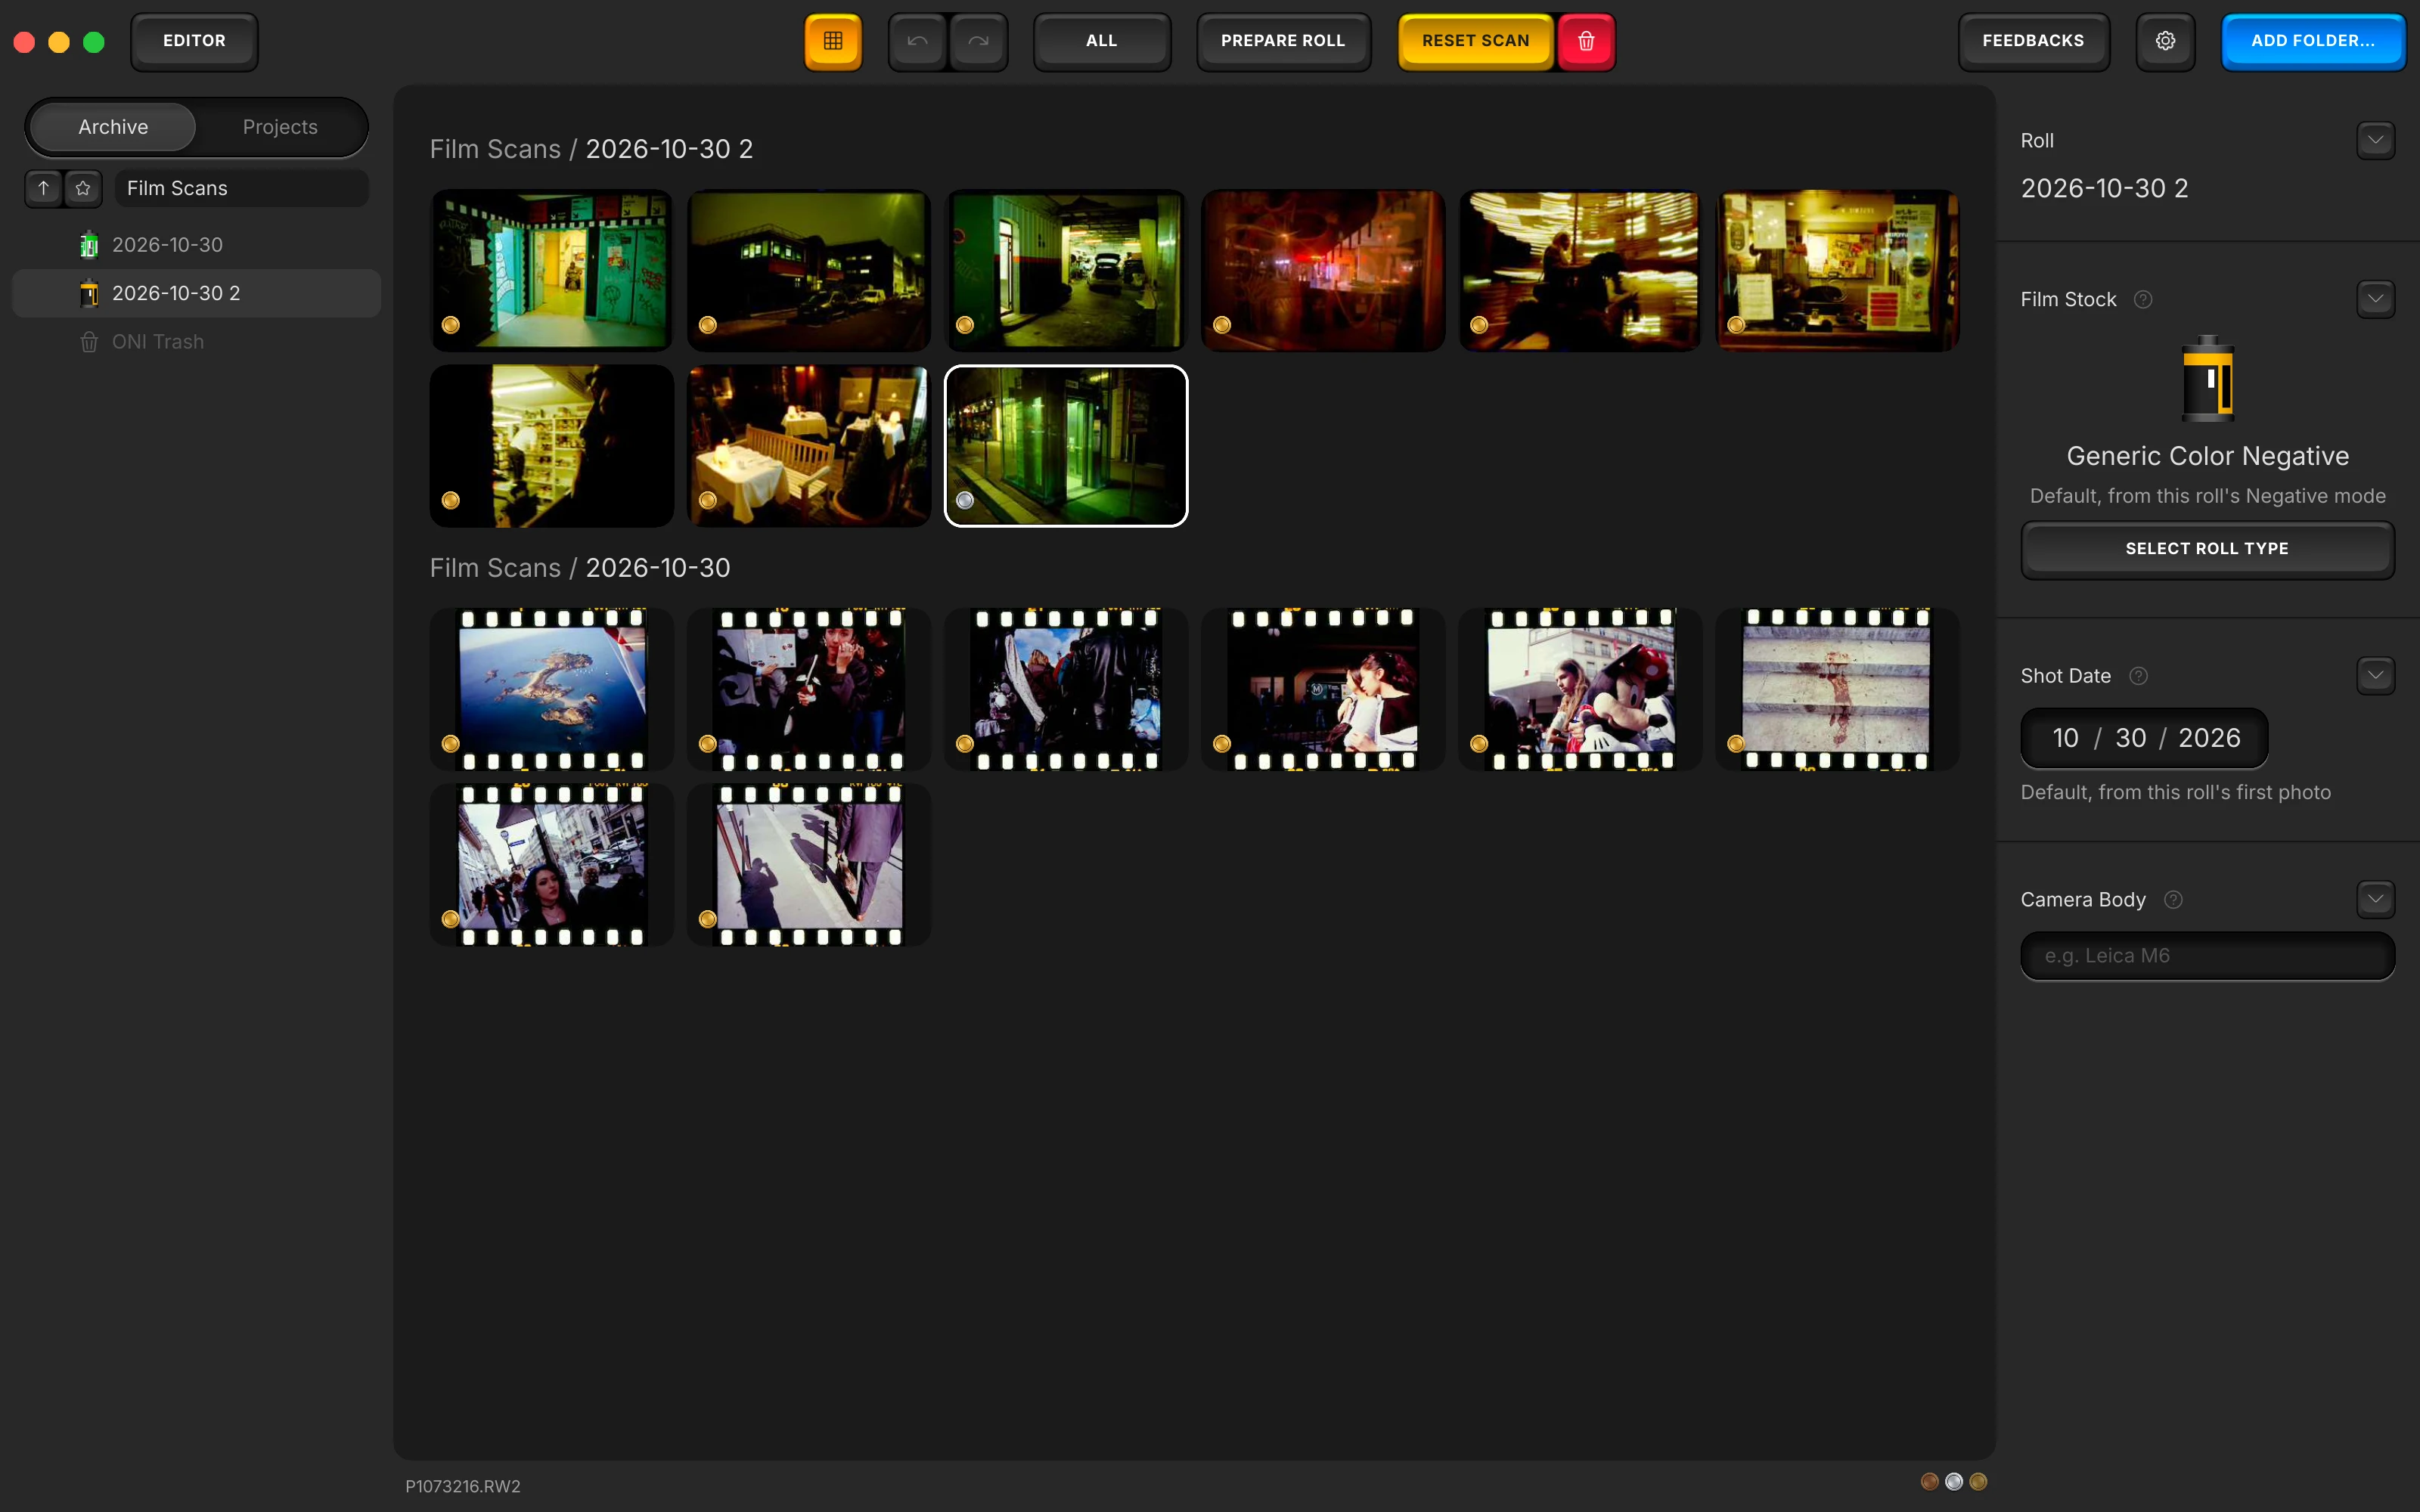
Your scans, as your disk holds them, in Open Negative Initiative. Open the folder of your scans, gather frames into rolls and photos into projects, label them and set some aside, part by part as the library column and the gallery lay them out.
Folders
The archive is your disk: open the folder that holds your scans and every photo in it and in its subfolders is there. Nothing is imported or copied, and each photo's settings live in a small file beside it.
- ADD FOLDER…
Your scans, where they are. ADD FOLDER… opens the folder that holds them and keeps it among your favourites. Nothing is copied.
What changed on the disk. Refresh reads your folders again and says what came and went.
The app's own note on Folders
The archive shows a folder of your disk and everything under it.
Add Folder
ADD FOLDER…, in the gallery's bar, opens the folder that holds your scans and stars it among your favourites. Every photo in it and in its subfolders is there at once, read straight from your disk: nothing is imported or copied, and your originals are never written to.
- Open Folder… (⌘O), in the File menu, opens a folder without starring it. A folder dropped on the window opens too.
- Each photo's settings live in a small file beside it, which travels with the photo when you move its folder.
- Pick the folder of your scans, not your whole disk: before reading a whole disk or your home folder, the app asks.
- It reads camera RAW files through LibRaw, linear DNG and TIFF scans, 16-bit TIFFs of 45 megapixels and more, and JPEG, PNG, GIF, BMP and WebP.
- A folder with Nikon High Efficiency RAW files (HE or HE* NEF) offers to convert them to lossless DNGs beside them, through Adobe DNG Converter, free from Adobe. When it is missing, ONI downloads it from Adobe, about 1.8 GB, and opens its installer.
- Once the DNGs are written, keep them alone, the NEF files moved to the Trash, or keep both, the better choice if you already opened them in another app.
The column's keys
A small plate of keys heads the column on the Projects tab, and on the Archive tab beside an open photo: show the selected photo, fold or open every folder of your projects, and lay the column out as Names only, Two thumbnails a line or One thumbnail a line.
- The gallery and the editor each remember their own layout.
- In the gallery, Show the Selected Photo, in the File menu, scrolls to the open or selected photo.
- The gallery's grid shows six or twelve photos a row: ⌘− and ⌘+, Smaller and Larger Thumbnails in the View menu, switch between them.
Refresh
Refresh (⌘R), in the File menu, reads the opened folder and every favourite again, then says what changed: photos added, photos no longer in the folder, photos that cannot be found, or nothing.
- Coming back to the window after working in another app, the opened folder is looked at again on its own.
- A photo whose original went missing, on an unplugged disk or after a move, stays in the archive, greyed, and is never removed on its own.
Nothing moves by hand
No drag moves a photo, a roll or a folder in the archive: your folders stay as they are on the disk. A drag only puts photos in order inside your projects.
- A right click on a folder offers Open, Add to Favourites, Rename…, Make a Roll or Back to a Folder, New Folder Inside, and Remove from Library…, which forgets the folder and touches no file.
- A folder out of reach also offers Locate…, to follow it where it went.
- Move into a New Roll… moves your photos into a new folder, after asking, and ⌘Z puts them back.
Archive and Projects
Two tabs over the library column. Archive shows a folder of your disk as it stands; Projects are lists you make from any of your photos, the one place where the order is yours.
Archive and Projects
Two tabs head the library column. Archive shows the folder you opened as your disk holds it, rolls and folders inside it; Projects shows the lists you made, whatever folder is open.
- In the gallery a click selects; select a roll or a project and its own facts fill the column on the right.
- Beside an open photo the column follows it, unfolded down to the photo's folder.
Projects
A project is a list of photos you gather from anywhere in your library: right-click a selection and choose New Project from it. A photo sits in one project at a time, and in a project the order is yours: drag photos to put them in order.
- Add to Project and Remove from Project are on the same right click. Adding a photo that sits in another project asks first, since it leaves that one.
- A project left empty stays, with its name and description; Delete Project, on its right click, removes it after asking, never its photos.
- A project never moves a file: your photos stay where the archive has them.
Roll
A roll is the frames of one film, measured together. Select one in the gallery and the column on the right holds its name and three facts about the film, never guessed from a scan.
- SELECT ROLL TYPE
What your roll was shot on. Picked by hand among forty-one stocks; a colour stock lays its dyes on the roll's frames.
- PREPARE THE ROLL…
Not measured yet. A roll that needs it says so over this key, which opens Prepare the Roll.
Not in a roll yet
Select photos that belong to no roll and the column on the right reads Not in a roll yet, with three steps: the frames selected (⌘A takes the whole film), a name and a stock, then the key that makes the roll.
- The key reads Make this folder a roll when you selected a whole folder, and Move into a new roll otherwise, which moves the photos into a new folder after asking.
- The photos must come from one folder; the guide says so when they do not.
- Nothing is made before you press the key. Next, Prepare the Roll measures the roll.
Roll name
Select a roll in the gallery and its name heads the column on the right; click the name to type another. The name is the roll's: the folder on your disk keeps its own, which Rename…, on the folder's right click, changes.
- Move into a New Roll… names a roll after the earliest capture date of its photos.
- A roll's row in the folder list wears its film stock's icon.
- A roll not measured yet says so at the top of the column, over a PREPARE THE ROLL… key.
- Travels
- Never: it belongs to the roll, kept in its folder's roll marker or in its frames' sidecars, never in a photo's look.
Film Stock
What the roll was shot on, picked with Select Roll Type among forty-one stocks grouped by brand; never guessed from a scan. Until you pick one, the block shows the generic stock of the roll's film type.
What this roll was shot on — never guessed, only ever what a hand picks.
- Picking a colour stock lays its dyes, Kodak, Fuji, Generic, ECN-2 or E-6, on every frame of the roll, as the Roll tab's dyes; a black and white stock has none.
- Its icon marks the roll in the folder list.
- It fills the Film field of your exports' EXIF.
- Travels
- Never: it belongs to the roll, kept in its folder's roll marker or in its frames' sidecars, never in a photo's look.
Shot Date
When the roll was actually shot, as three plain fields: month, day and year. Until you set it, it shows the date of the roll's first photo; a key beside the fields clears a date you set.
When the roll was actually shot. Organisational only — never a photo's own capture date.
- Travels
- Never: it belongs to the roll, kept in its folder's roll marker or in its frames' sidecars, never in a photo's look.
Camera Body
The body the roll was shot on, typed by hand and kept when you press Return or click elsewhere. A scan's own EXIF names the scanner or the copy camera, so it is never read from there.
The body this roll was shot on, hand-entered — never read off a scan's own EXIF.
- It fills the Camera field of your exports' EXIF.
- Travels
- Never: it belongs to the roll, kept in its folder's roll marker or in its frames' sidecars, never in a photo's look.
Project
Select a project and the same column holds its name, the stocks among its photos and a description.
The app's own note on Project
Every stock among this project's own photos — counted by photo, since a project rarely holds a whole roll.
Film Stocks
Every stock among a project's photos, with its icon and a count of photos, since a project rarely holds a whole roll. It only reads: to change a stock, pick it on the roll itself.
- No stock set yet means none of the project's rolls has a stock picked.
Project name and Description
Select a project and its name heads the column on the right, its first photos stacked under it; click the name to rename it. Under the film stocks, a Description field holds a few lines on what the project is for.
Labels
A label marks a photo for yourself, and the filter shows one label at a time in the gallery.
A label in one key. 0 for None, then Bronze, Silver and Gold.
- ALL
One label at a time. The filter in the gallery's bar, or ⌘L, steps through All, Bronze, Silver and Gold.
Labels and the filter
Four labels, None, Bronze, Silver and Gold, set from the Labels menu, the bare keys 0 to 3, a right click, or the medals in the status bar. ⌘L cycles the gallery's filter through All, Bronze, Silver and Gold.
- The digits are off while you type in a field, so typing a name never labels a photo.
- In the gallery the filter also stands in the bar, in words: ALL, BRONZE, SILVER, GOLD. Each shows exactly that label.
- In the status bar, a click on the label a single photo already wears takes it off; on several photos, they all take the one you click.
Files
Deleting is reversible: a photo moved to the ONI Trash keeps its file and its settings, and Restore puts it back in its folder, its roll and its project.
ONI Trash
Move to ONI Trash (⌘⌫) sets the selected photos aside in the ONI Trash, at the foot of the folder list. Their files stay where they are on your disk; nothing moves and nothing is erased.
- In the File menu, on a right click, and as the red key of the gallery's bar; ⌘Z takes it back.
- Open the ONI Trash to see its photos, newest first, whatever folder or disk holds them. Restore (⇧⌘⌫) puts the selected ones back in their folder, roll and project.
- The RESTORE key on the ONI Trash's row restores every photo in it, after asking.
- In the editor, moving the open photo to the ONI Trash goes on to the roll's next frame.
The rest of the manual.
Every surface of the app, in the order of your work. From the folder of scans to the exported file.
- Prepare the RollThe five steps a roll goes through before its frames are edited: film, flat-field, film base, flags, measuring frame, then Measure.
- RollWhat a roll shares: film type, flat-field, source encoding, the manual balance, the levels, dye separation and Balance strength.
- CropThe framing's own Copy and Paste, aspect ratio, straightening, quarter turns and mirrors, and the measuring window.
- ColorAuto White Balance, Temperature and Tint, Lighting, Effects, Curves, the finishing blocks, and Paper Correction on a paper profile.
- DetailsSharpening, chroma denoise and texture, the stages that act on the grain, judged in the loupe at full resolution.
- De-dustThe brush for dust and scratches, its size, and the list of corrections painted on the open photo.
- ScannerThe Scanner face: ONI or Frontier, a lab scanner's keypad of D, C, M, Y and TEMP, and the finish laid after its render.
- PresetsThe deck, saving a preset, its eighteen switches and white balance choice, the Settings menu, and Copy and Paste.
- ExportThe export screen: three presets, format, space and paper profiles, size, the HDR hack, each photo's EXIF line.
- Toolbar and menusEvery key of the bar and of the canvas margin, and every menu item with its shortcut.
- The whole manualEvery surface on one page, in the order a roll goes through the app.
- The guideYour first negative converted, step by step.
Convert your first roll tonight.
Add your folder, prepare the roll once, export. Free, and nothing else to install.
- Mac
- macOS 13 or later on Apple Silicon or Intel
- Windows
- Windows 10 or 11 (64-bit)
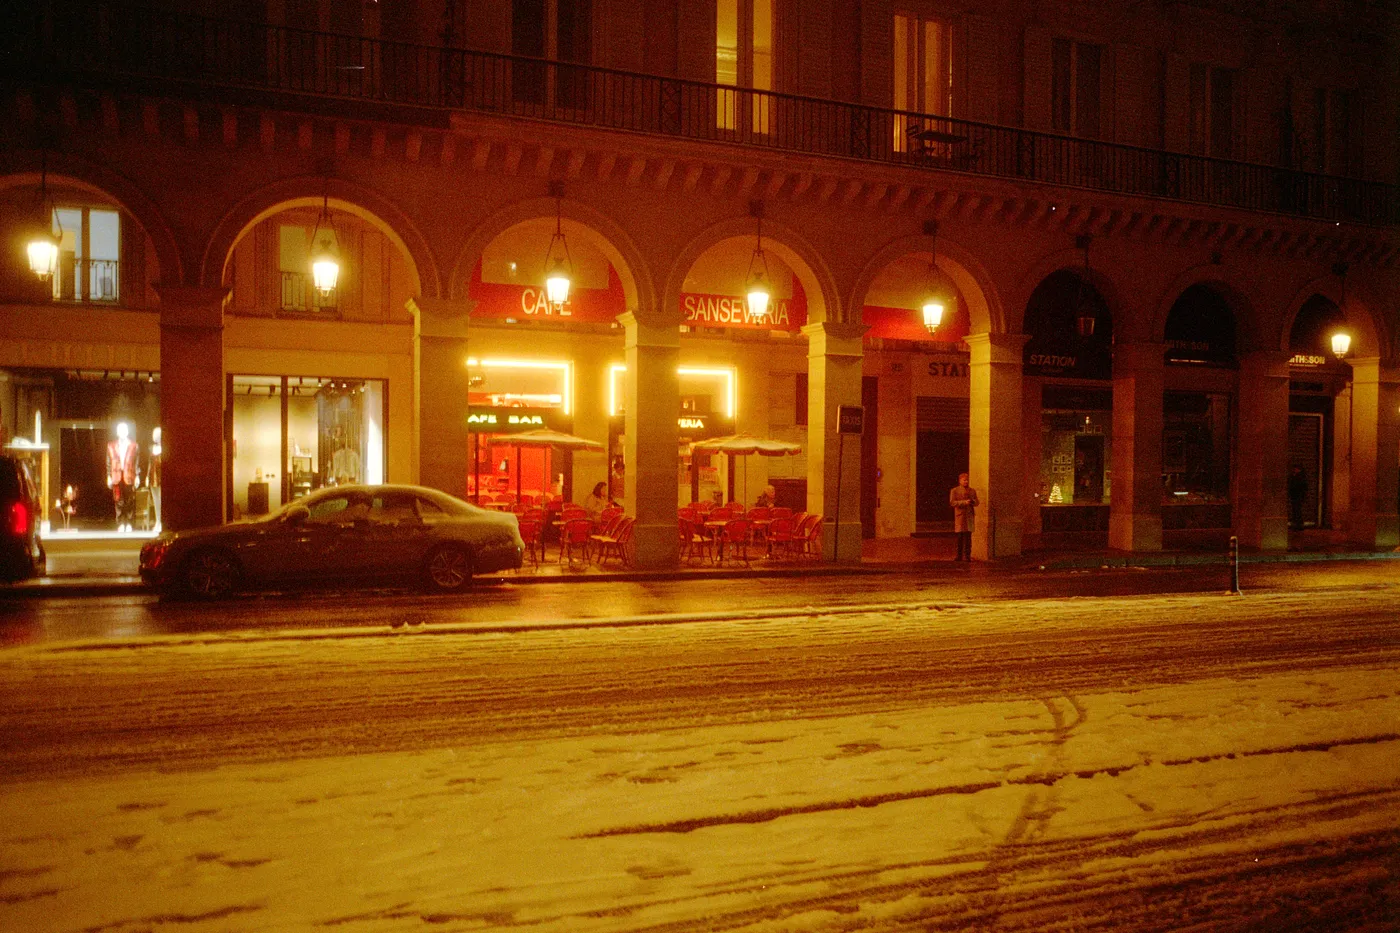
Snow night. Kodak Gold, converted in Open Negative Initiative.