Prepare the Roll
Your roll, measured as a whole, in Open Negative Initiative. Five short steps before your frames are edited: the film, the light panel, the bare film, the frames left out and one measuring frame; a roll of slides takes a white or grey in place of the bare film, and walks four. Then Measure converts the whole roll at once.
Opening
Your roll is measured as a whole before its frames are edited. Prepare the Roll takes the place of the settings panel and walks five steps, four on a roll of slides, with the frame you work on beside it; three steps play a short clip of the gesture.
- PREPARE ROLL
From the gallery. PREPARE ROLL, in the bar, prepares the roll of the photos you selected.
- PREPARE THE ROLL…
From the roll itself. A roll not measured yet says so at the top of its column, over this key.
How it opens
Open a frame of a roll never measured and Prepare the Roll starts on its own. You can also start it from PREPARE ROLL in the gallery's bar, PREPARE THE ROLL… at the top of an unmeasured roll's column, or Prepare the Roll… in the Rolls menu.
- It takes the place of the settings panel, its step's title and a line of advice at the top, the frame you work on beside it.
- Three steps play a short clip of their gesture: the film base, the flags and the measuring frame.
- Cancel, or Esc, leaves without measuring, and the roll keeps where you stood: start it again and it resumes at that step.
- A slide opened in the editor does not start it; a slide roll is prepared from the keys and the menu.
Which frames are measured
With one photo selected, Prepare the Roll takes its whole roll: the frames of its folder measured with it, and those never measured. With several selected, it takes exactly those.
- Frames of the folder measured on another roll stay out, and the first step says how many, so preparing one roll never resets another.
- A contact sheet is never one of the frames.
Film
Step one: what the roll is and what digitised it. Every frame is converted as that film, and a scanner's even light skips the flat-field step.
What your film is. Negative, Positive for slides, or B&W: every frame of the roll is converted as that film.
What digitised it. A scanner, a camera over a light panel, or three shots per frame under red, green and blue light.
The app's own note on Film
Choose the film and what you digitised it with. The wrong film type converts every frame of the roll wrong.
Film and Digitised with
Step 1, Select the Film Type: Film is Negative, Positive or B&W, and Digitised with is Scanner, DSLR Scan or RGB Passes. DSLR Scan is chosen when the roll opens.
- Scanner skips the flat-field step: a scanner lights your film evenly.
- DSLR Scan is a camera over a light panel, which the next step evens out.
- RGB Passes is each frame shot three times, under red, green and blue light: the app groups the three files and reads them as one frame.
- Positive, for slides, turns step 3 into Pick a White or Grey and walks straight on to the measuring frame.
- The film type can be changed later in the Roll tab, for the whole roll.
Pass Order
With RGB Passes, the first step shows the first frame's three files in the order they were taken, each under the band it is read as. The order is read off the files; drag a band to change it, for the whole roll.
The first frame's three files in the order they were taken, each under the band it is read as. The order is read off the files when RGB Passes is chosen; drag a band between two others to move it. The order holds for the whole roll.
- A line counts the frames and the files they come from. When the files do not fall into threes, Check the grouping says how many are left out.
- Shift by One File starts the groups one file later; or leave a stray file out of your selection before preparing the roll.
- Once measured, each frame shows alone in the gallery, its three files behind it.
Flat-Field
Step two, for a camera over a light panel: the panel's own unevenness, taken from a shot of the empty panel on the same rig. Skip it when your light is even.
- USE THIS FRAME AS FLAT-FIELD
Your light panel, evened out. Click the shot of the empty panel among your frames, then this key.
- LOAD…
Or a mask from elsewhere. Behind the gear key, a picture of the empty panel from anywhere on your disk.
The app's own note on Flat-Field
Click the shot of the empty light panel, or pick one you loaded before. Skip it if your light is even; otherwise uneven light darkens or tints the corners of every frame.
The flat-field step
Step 2, Set Up the Flat-Field: click the shot of the empty light panel among the roll's frames, then USE THIS FRAME AS FLAT-FIELD. Or switch Flat-field on and pick, under Mask, one you loaded before. SKIP when your light is even.
- The shot taken as the mask leaves the roll: it is never measured.
- The gear key shows Amount, Temperature and Tint (Amount alone on black and white), and LOAD…, to take a picture of the empty panel from anywhere on your disk. The three sliders are kept for your next roll.
- The mask is written on every frame of the roll, and the roll is measured through it.
Base
Step three, on a negative: the bare film, clicked by hand on one scan, which the app never looks for. On a roll of slides: a white or grey you click, which sets the colour of the whole roll.
- 2 px
The disc your click reads. From 2 to 24 pixels, resting at its narrowest for a thin border.
- CLEAR
Picked by hand. Click the bare film on one scan, or a white or grey on a slide; CLEAR takes the pick back.
The app's own note on Base
Choose a scan, then click on bare film: the border or the gap between two frames. A click on the picture instead shifts the blacks and colours of the whole roll.
Pick the Film Base
Step 3, Pick the Film Base: choose a scan in the grid or with Previous and Next, then click the bare film on it, the border or the gap between two frames. Every channel's black sits on it; SKIP, and the black is read across the roll's frames instead.
- The whole scan shows on the card, with a loupe riding the pointer at full resolution and a ring the size of the disc read.
- The click is the pick, and the panel names the scan it was made on. Clear takes it back.
- Picked by hand, never found: the app does not look for the film base.
- On a roll of slides, this step is Pick a White or Grey: click something white or grey on one slide, a cloud, a wall, a grey road or the bare light through a sprocket hole. The roll's gains turn its colour neutral and keep its brightness, the same gains for every slide. Skip it, and your slides keep the camera's 5500 K.
- On a slide, pick a white or a grey rather than a black: a slide's blacks are rarely neutral.
- A scan that cannot be read says why on the card, and a Nikon High Efficiency RAW offers Convert to DNG there.
Picker Size
The size of the disc your next click reads the bare film on, in pixels of the measuring copy. It rests at its narrowest, since the bare film can be a border a few pixels wide; a double click returns it there.
- It is remembered from one roll to the next. A base already picked keeps the disc it was read with.
- A wider disc averages the film's grain: keep it on the bare film.
- Picker Size
- 2 px to 24 px, at rest 2 px
- Travels
- Nothing to carry: it is a preference of yours (the base picker's size), not a setting of the photo, and it is not written to the sidecar.
Frame
Steps four and five: flag the frames that must not weigh on the roll, then place one measuring frame for the whole roll. A roll of slides goes straight to the measuring frame.
- CLEAR FLAGS
Frames left out of the measure. Flagged, a light leak is still converted but never weighs on your roll.
- 1 / 9
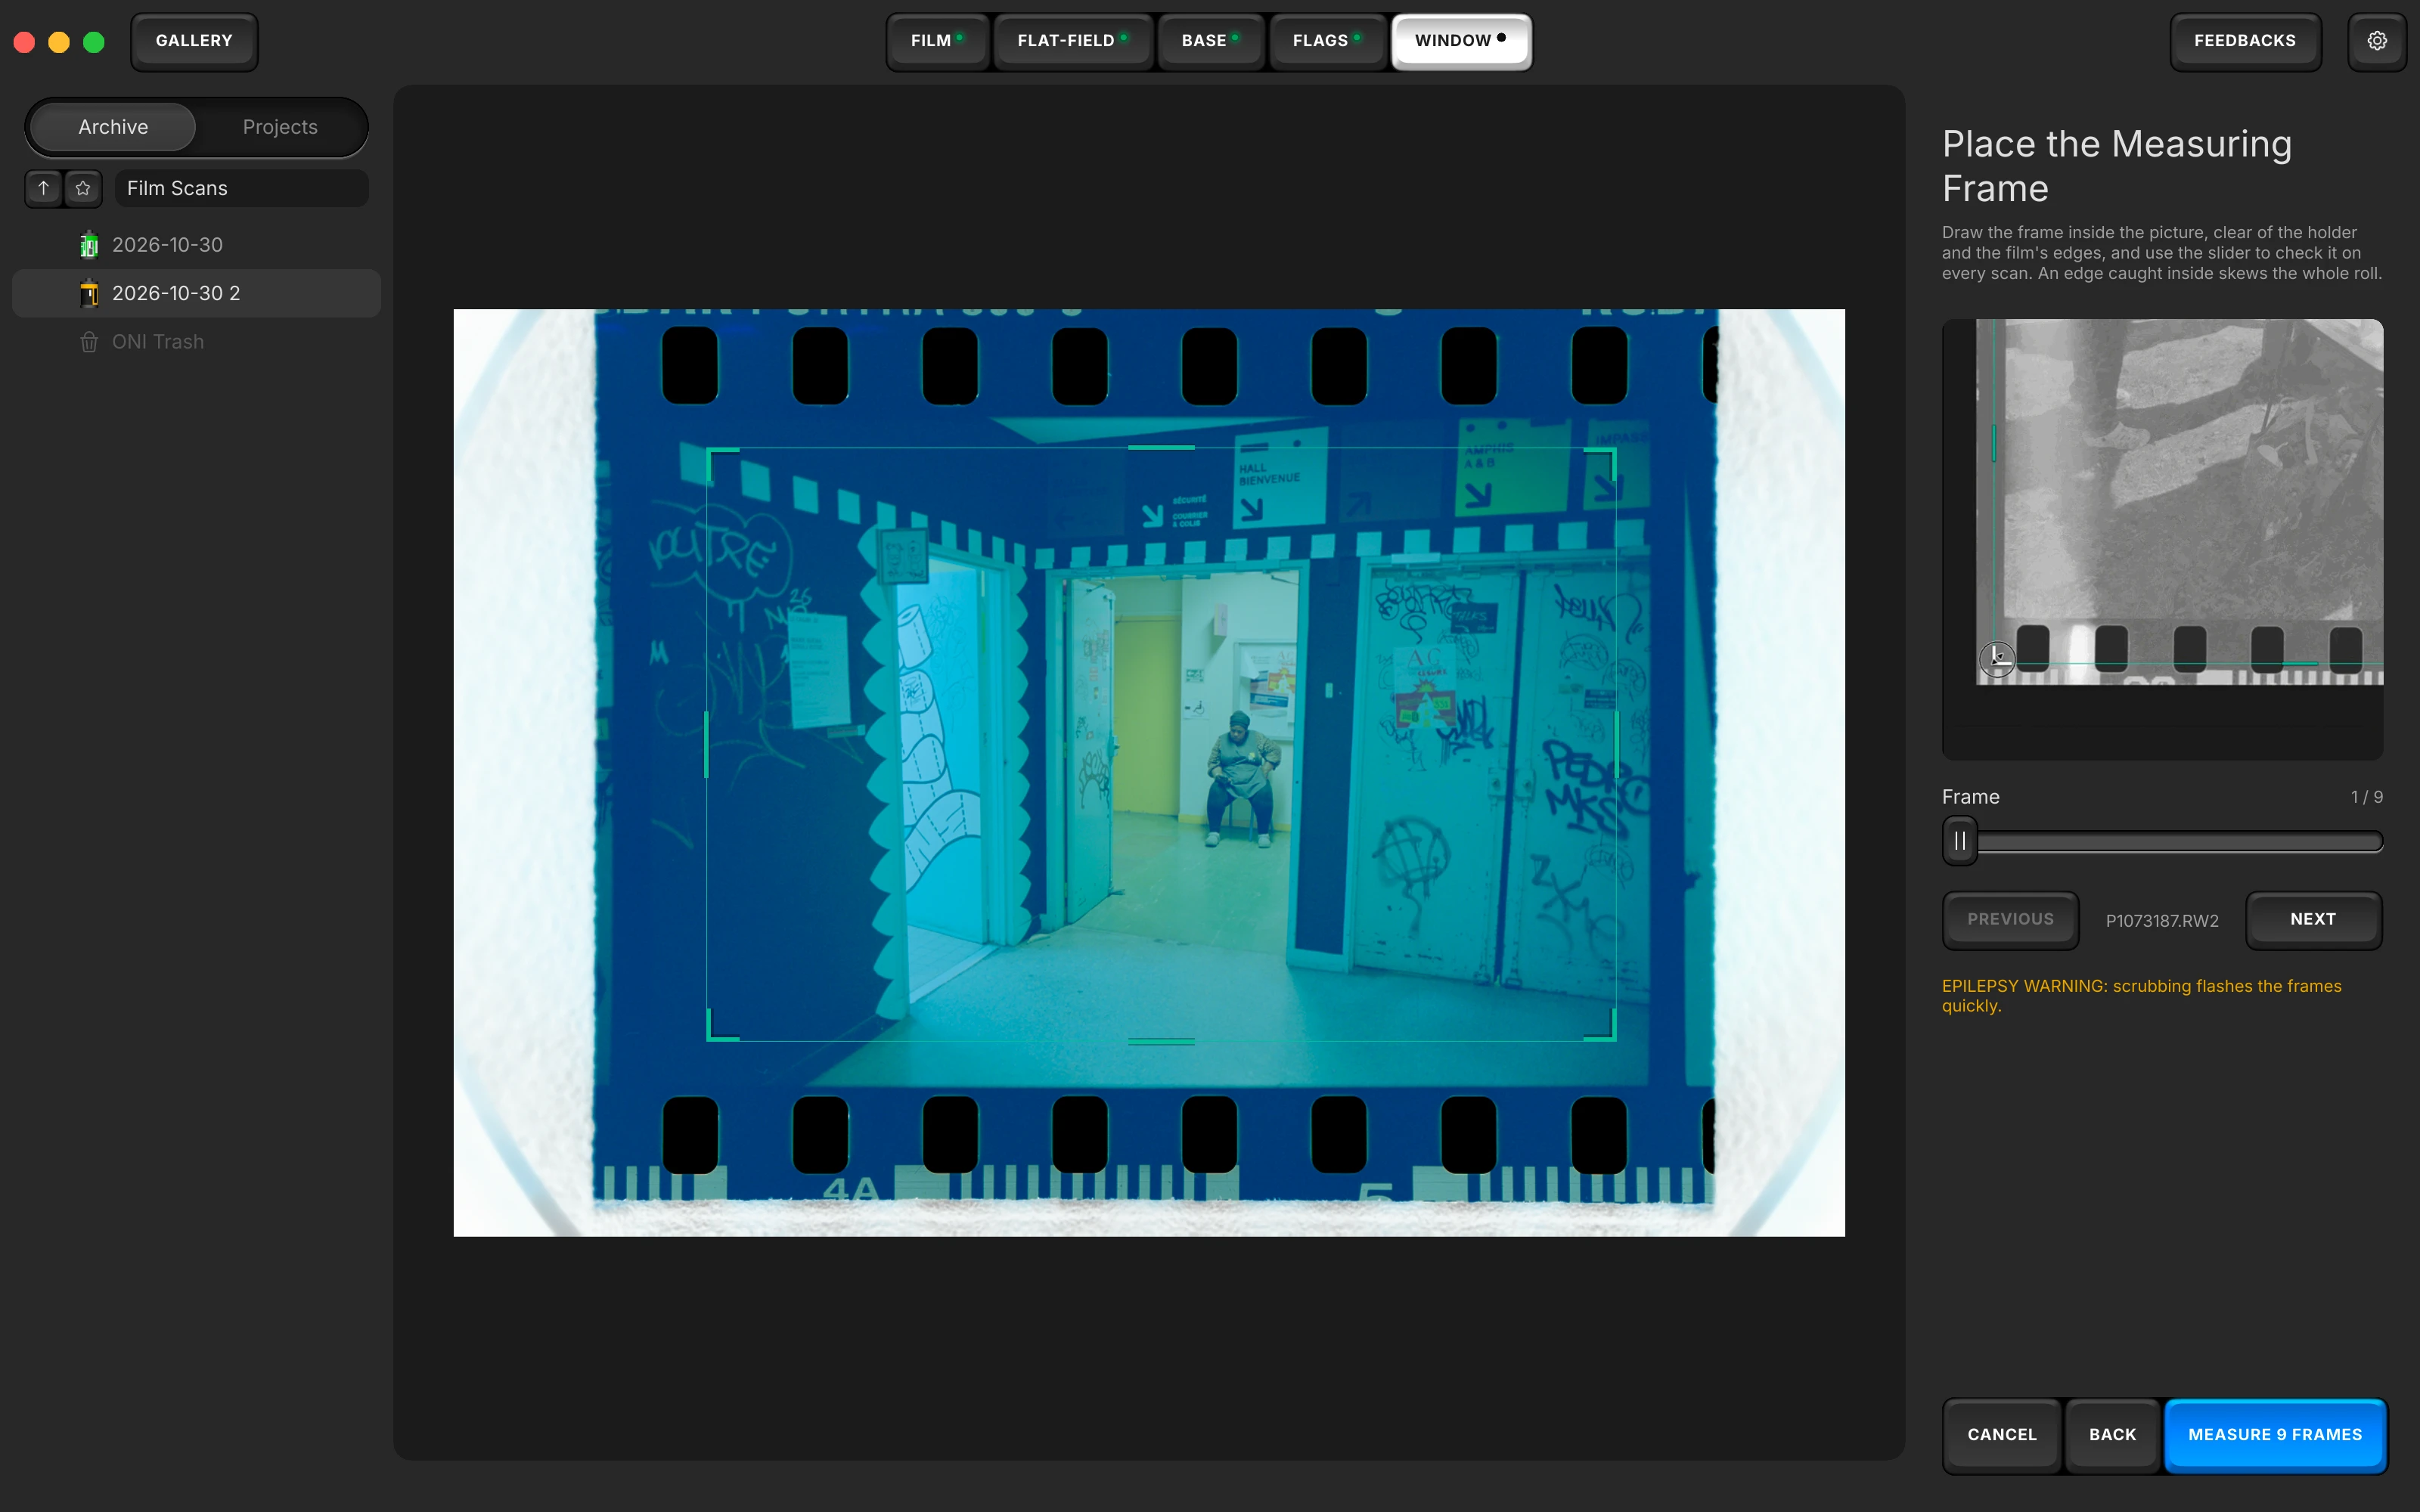
One window, checked everywhere. Scrub the frames measured to see the window on each of them.
The app's own note on Frame
Draw the frame inside the picture, clear of the holder and the film's edges, and use the slider to check it on every scan. An edge caught inside skews the whole roll.
Flag the Frames Left Out
Step 4, Flag the Frames Left Out: the roll shows as a sheet, six to a row; click the light leaks, the cut first frame and the extreme shots. They are still converted with the roll, but never weigh on its measurement.
- The panel counts how many frames are measured and how many are flagged; CLEAR FLAGS starts again.
- A roll of slides walks past this step: its colour comes from the white or grey you pick at step 3.
Place the Measuring Frame
Step 5, Place the Measuring Frame: drag the frame on the scan until it sits inside the picture, clear of the holder and the film's edges. Then scrub the Frame slider, or use Previous, Next and the arrow keys, to check it on every frame measured.
- One scan shows at a time, whole and uncropped, the film's edges included, so you can keep the frame clear of them on every scan. Your crop is kept for the editor.
- Scrubbing flashes the frames quickly, and the step warns of it in capitals.
- Every frame is read through this one window: an edge caught inside it skews the whole roll.
- On a roll of slides, every slide keeps it as its measuring frame.
Settings differ across the roll
Prepare the Roll reads each frame's shutter speed, aperture and ISO. When some frames were digitised with other settings than most of the roll, the panel warns, Settings differ across the roll, marks them, and their exposure is evened out to the roll's.
- A different aperture also changes the vignetting the flat-field measured: the warning suggests shooting those frames again in manual.
Measure
The keys that walk the steps, and what Measure leaves on your roll.
- CANCELBACKNEXT
One key per step. NEXT reads SKIP while an optional step is untouched, then counts your frames.
- MEASURE 9 FRAMES
The whole roll at once. Every frame is read through one window, and written as one undo step.
Cancel, Back, NEXT and SKIP
Under the steps: CANCEL, BACK from the second step on, and the step's own key, NEXT, which reads SKIP while an optional step is left untouched. On the last step it becomes MEASURE 9 FRAMES, counting the frames measured.
- The bar shows the five steps as keys, FILM, FLAT-FIELD, BASE, FLAGS and WINDOW: click one to go to it. A lamp lights on each step behind you, and a step your roll skips is greyed.
- While Measure reads, CANCEL becomes STOP. Esc cancels, and the GALLERY key leaves as CANCEL does.
What Measure writes
The measure reads every frame through the measuring frame, one at a time, its red, green and blue shown on their own screens as it goes. The roll's colour is set on the middle of its frames, so one tinted or extreme frame cannot tint the whole roll. Then the editor opens on your frames, already converted.
- Every frame is written from rest, its crop, flat-field and dust corrections kept, as one undo step in the gallery.
- The whole roll comes back selected, the frame you opened first.
- A frame that could not be read is left as it was, and the app names it. A frame with nothing to measure takes the roll's settings without weighing on them.
- The roll opens side by side: Auto White Balance there gives every frame the same balance, the average of theirs. Select one frame on its own to balance it alone.
- On a roll of slides, Measure gives every slide the gains of the white or grey you picked, or the camera's 5500 K when you skipped it; each slide's black and white stay at rest.
The rest of the manual.
Every surface of the app, in the order of your work. From the folder of scans to the exported file.
- ArchiveOpening the folder of your scans, your folders and favourites, the Archive and Projects tabs, a roll's own facts, the Rolls and Labels menus, and the ONI Trash.
- RollWhat a roll shares: film type, flat-field, source encoding, the manual balance, the levels, dye separation and Balance strength.
- CropThe framing's own Copy and Paste, aspect ratio, straightening, quarter turns and mirrors, and the measuring window.
- ColorAuto White Balance, Temperature and Tint, Lighting, Effects, Curves, the finishing blocks, and Paper Correction on a paper profile.
- DetailsSharpening, chroma denoise and texture, the stages that act on the grain, judged in the loupe at full resolution.
- De-dustThe brush for dust and scratches, its size, and the list of corrections painted on the open photo.
- ScannerThe Scanner face: ONI or Frontier, a lab scanner's keypad of D, C, M, Y and TEMP, and the finish laid after its render.
- PresetsThe deck, saving a preset, its eighteen switches and white balance choice, the Settings menu, and Copy and Paste.
- ExportThe export screen: three presets, format, space and paper profiles, size, the HDR hack, each photo's EXIF line.
- Toolbar and menusEvery key of the bar and of the canvas margin, and every menu item with its shortcut.
- The whole manualEvery surface on one page, in the order a roll goes through the app.
- The guideYour first negative converted, step by step.
Convert your first roll tonight.
Add your folder, prepare the roll once, export. Free, and nothing else to install.
- Mac
- macOS 13 or later on Apple Silicon or Intel
- Windows
- Windows 10 or 11 (64-bit)
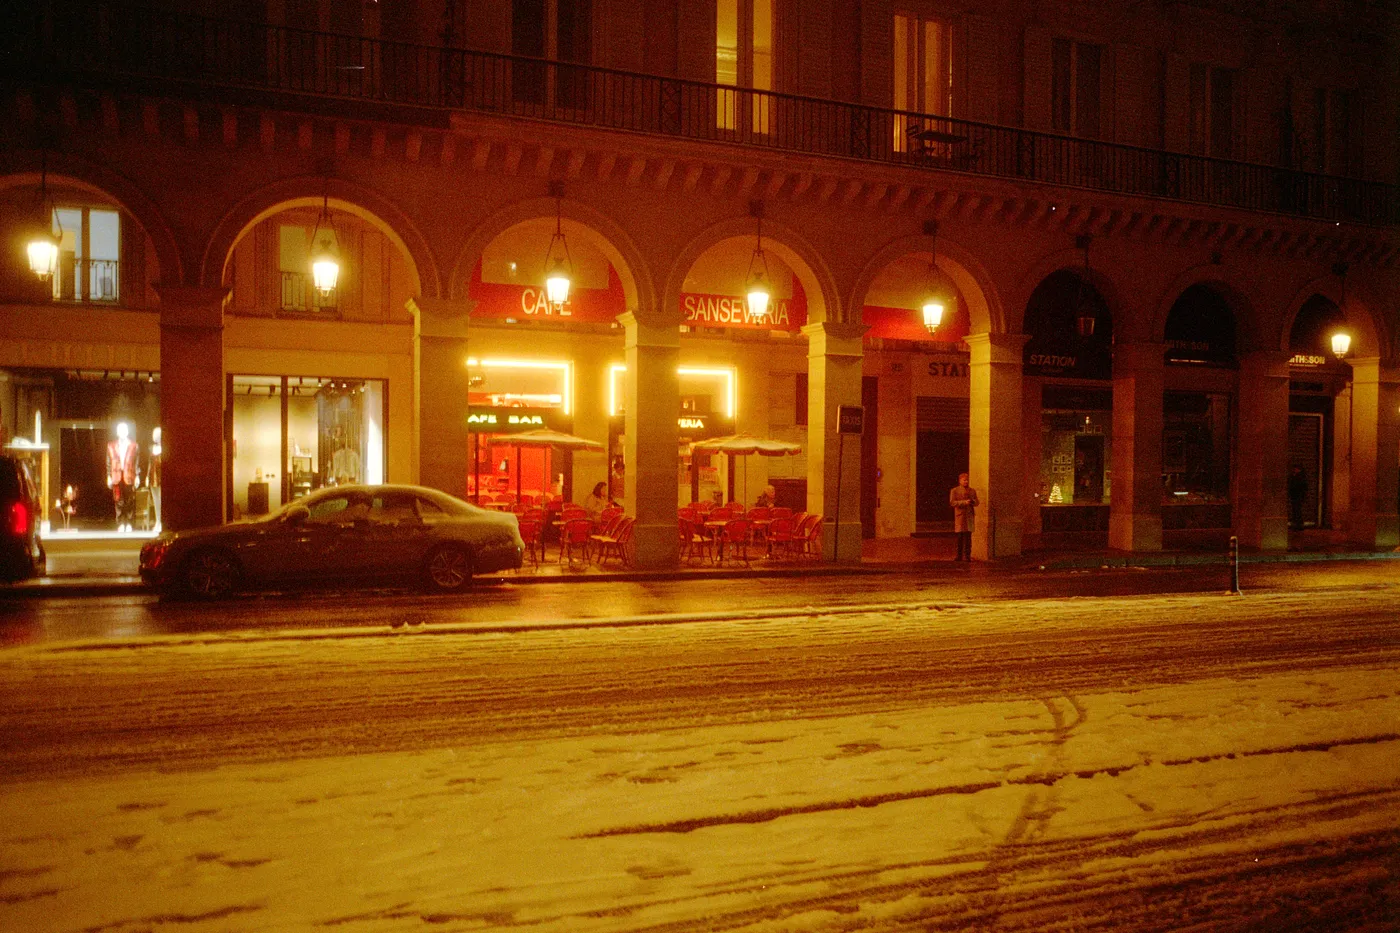
Snow night. Kodak Gold, converted in Open Negative Initiative.